Children's work painting with paints. Traditional painting techniques
All-Russian competition of pedagogical excellence “Methodological piggy bank of a kindergarten teacher”
Municipal preschool educational institution № 200
MASTER CLASS “NON-TRADITIONAL DRAWING TECHNIQUES”
Completed:
Teacher of the first qualification category
Malyshko Alena Igorevna
Kemerovo 2017
Master class “Unconventional drawing techniques”
Target: expand the knowledge of teachers through familiarity with non-traditional drawing techniques, as a means of developing preschoolers’ interest in visual creativity.
Tasks:
Introduce teachers to unconventional technology drawing - with milk, shaving foam;
Teach practical skills in the field visual arts using several unconventional methods in drawing;
Increase the skill level of teachers.
Methods and techniques: reproductive, practical, verbal, visual.
Equipment: didactic means - drawings made using non-traditional drawing techniques; tables, chairs for teachers; material for practical activities - gouache, jars of water, brushes, landscape sheets of paper, shaving foam, PVA glue, transparent plates, toothpicks, wet wipes for each teacher; audio means - presentation “Non-traditional drawing techniques”, CD player, projector, laptop, flash drive.
Preliminary work: studying Internet resources on this topic, preparing equipment.
Progress of the master class:
Relevance of the chosen master class topic:
Drawing classes solve the problems of the comprehensive development of children, which is necessary for successful learning at school.
In the process of work, children develop mental operations, teamwork skills, and the ability to coordinate their actions with the actions of their peers.
Children from the very early age They try to reflect their impressions of the world around them in their fine art. Observations of the effectiveness of drawing in kindergarten lead to the conclusion about the need to use non-traditional techniques that will create a situation of success for pupils and form a stable motivation to draw.
Drawing in unconventional ways is a fun, mesmerizing activity that surprises and delights children. There are many non-traditional drawing techniques; their unusualness lies in the fact that they allow children to quickly achieve the desired result. For example, what child would not be interested in drawing with his fingers, making a drawing with his own palm, putting blots on paper and getting a funny drawing. The child loves to quickly achieve results in his work.
The developing environment plays an important role in the development of a child. Therefore, when organizing a subject-development environment, it is necessary to take into account that the content is developmental in nature and is aimed at developing the creativity of each child in accordance with his individual capabilities, accessible and appropriate to the age characteristics of children. At home, each of us has unnecessary things (toothbrush, combs, foam rubber, corks, polystyrene foam, spool of thread, candles, etc.). Walking along the street or in the forest you can find a lot of interesting things: sticks, cones, leaves, pebbles, plant seeds, dandelion fluff, thistle, poplar. With all these items it is possible to enrich a corner of productive activity. Unusual materials and original techniques They attract children because you can draw with whatever you want and how you want, and you can even come up with your own unusual technique. Children feel unforgettable, positive emotions, and by emotions one can judge the child’s mood, what makes him happy, what makes him sad.
Using non-traditional techniques:
Helps relieve children's fears.
Develops self-confidence.
Develops spatial thinking.
Teaches children to freely express their ideas.
Encourages children to creative searches and solutions.
Teaches children to work with a variety of materials.
Develops a sense of color perception, a sense of texture and volume.
Develops fine motor skills of the hands.
Develops Creative skills, imagination and flights of fancy.
While working, children receive aesthetic pleasure.
Let me tell you a little about them.
With younger children preschool age recommended to use:
Finger painting;
Imprint with stamps made of potatoes, carrots, polystyrene foam;
Drawing with palms.
drawing on a wet sheet of paper
Children of middle preschool age can be introduced to more complex techniques:
Poking with a hard, semi-dry brush.
Foam rubber printing;
Printing with corks;
Wax crayons + gouache
Candle + watercolor;
Leaf prints;
Palm drawings;
Drawing with cotton swabs;
Magic ropes;
Subject monotype.
At older preschool age, children can master even more difficult methods and techniques:
Drawing with salt, sand, semolina;
Drawing with soap bubbles;
Drawing with crumpled paper;
Blotography with a tube;
Landscape monotype;
Screen printing;
Blotography is ordinary;
Plasticineography
Scratch.
Drawing using unconventional techniques fascinates and captivates children. This is a free creative process, when the word “forbidden” is not present, but there is an opportunity to violate the rules for using certain materials and tools. Humanity does not stand still, we are constantly developing and inventing something new. Likewise, in the field of art, many new unconventional techniques have appeared, which today I want to tell you about.
1.Drawing with cling film.
Did you know that film can also draw? It is enough to lay it on wet watercolor and move it. The result is ice crystals or other kinds of abstractions.
2. Drawing on foil.
Drawing on foil is very different from paper. Firstly, you can clearly see how the colors mix, and secondly, the paint glides well. Suitable for developing sensory sensations in babies. You can draw with your fingers, brushes, or cotton swabs.
3. Drawing with toothpicks on PVA glue.
Pour PVA glue onto the paper and draw marks on it with toothpicks or cotton swabs. If you use a transparent plastic lid, for example, from a sour cream container, as a base, then after the design has dried, you can cut out, for example, a heart from it and hang it on a tree on a string.
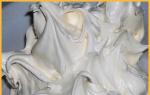
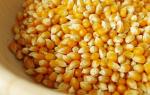
4. Drawing on milk.
For bold creative experiments you will need very simple and safe ingredients:
- whole milk, it is important that it is not skimmed, it is better if it is homemade;
- diluted in water food colorings;
- a flat plate or shallow tray;
- liquid soap or dishwashing detergent.
To begin with, pour a little milk into a plate and give the child jars of paints, from which he must randomly add several drops of paints of different colors onto the milk. The resulting drawing will already be very interesting. But that is not all. You need to drop a little liquid soap or dishwashing detergent into our container. And then just watch the wonderful transformation and movement happening in the plate. Each drop, falling on the surface, starts a fantastic dance of flowers. The child will absolutely love the process itself and its unexpected results. Watching amazing transformations is very interesting and very instructive. In addition, this amazing series of transformations can be photographed and, by printing interesting abstract photographs, you can decorate the interior with the results of joint creativity with children. There can be a lot of photographs, because the movement and transformation in the plate will continue for a long time. Having carried out such an interesting experiment, next time you can invite the child to participate in the process himself and try to form a drawing. For this preparatory stage will be the same, but we don’t pour dishwashing liquid into milk, but dip ordinary cotton swabs into it and give it to the child. When he puts them in milk, the transformation process will begin, and the baby will be able to participate in creating patterns.
I offer you another one unconventional look technique is painting on kefir, this type of technique is called EBRU. Pour kefir into a plate. Add a few drops of paint to the kefir. Dip two cotton swabs in liquid soap and immerse them in a plate with kefir. We watch how the colors begin to create beautiful patterns. You can also get a print on a sheet of paper; to do this, you need to take a sheet of paper, place it on the milky drawing and then pull it out to dry.
5. Glue to create a 3D effect.
Very interesting drawings of a different kind are obtained with PVA glue. It or hot glue can be used to give the drawing volume and relief.
6. Salt drawing.
Apply the design with PVA glue, sprinkle with salt and let dry. Then, using a brush, we pick up paint and drip it onto the salt base. The paint spreads itself and mixes beautifully.
7. Drawing with shaving foam.
Drawing with shaving foam is a fun and interesting process. The foam is pleasant to the touch, gives new tactile sensations and a pleasant smell. Easily washes off hands, clothes and any surface.
Creativity using such an unconventional drawing technique creates positive motivation for drawing, relaxes, awakens imagination and gives a lot of positive emotions!
"Volume" paints
You will need: 2 parts shaving foam + 1 part PVA glue + paint.
First you need to mix glue and paint, then add shaving foam. Mix everything thoroughly. The paints are ready, you can apply them to the finished outline or/and show your imagination and come up with a design yourself.
Joint drawing with teachers with shaving foam using the “Volume” paint technique on a free theme.
Place “volumetric” paints in a thick food bag (or tube). Cut off the tip of the bag with scissors, you get a kind of pastry syringe. By pressing on the paint bag, we create a pattern.
To prepare the modeling mass we will need:
400 grams of starch + 100-200 grams of foam + paint
Mix everything well with your hands until you get lumps (the material looks like grains of cottage cheese or wet sand). After playing, do not throw away the modeling mass, but pour it into a regular bag or make a toy to develop fine motor skills.
To create a toy you will need modeling mass, a balloon, a funnel, and a stick for pushing the sticky mass.
8. Pointillism for children.
One of the most interesting and unusual areas of painting. This is a manner of painting pictures using separate strokes of a regular, dotted or rectangular shape. Artists, applying pure paints to canvas, counted on the optical mixing of colors in the viewer's eye, and they succeeded. For children, this technique is difficult, and therefore I bring to your attention unconventional pointillism for children.
The name of the movement in painting, pointillism, comes from the French word pointiller, which means “to write with dots.” Artists who worked in the pointillism style applied pure paints to the canvas, not previously mixed on the palette. Optical mixing of colors occurred already at the stage of perception of the picture by the viewer.
Optical mixing of three pure primary colors and several pairs of additional colors makes it possible to obtain sufficiently greater brightness than by mechanically mixing pigments.
I suggest you master the “pointillism” technique using materials that are not entirely traditional for it - colored markers (felt-tip pens). Preschool children love to experiment with visual materials. The proposed method of depicting dots using felt-tip pens allows not only to develop fine motor skills of preschoolers, their perseverance, color perception, but also to increase the emotional background, since the image using felt-tip pens (color markers) does not require drying, there will be no spreading of paints or inaccurate mixing.
10. Grisaille (French Grisaille from gris - gray)- a type of monochromatic (monochrome) painting performed in different tones of the same color. That is, all the work is done exclusively with paint of one or two colors, but of different tones (somewhere paler, somewhere darker, brighter).
11. Frottage
Technique of drawing a picture on paper, fabric. To create a pattern, a relief surface is used, which is located on the back side of the paper (fabric); this relief surface is displayed on the front side of the paper (fabric) by friction of a coloring material (for example, a pencil).
One of the most popular objects are tree leaves.
Suitable for work and fresh leaves, and dry. You need to decide on the shape and size of the leaves and assemble the composition. Very often in craftsmanship many surfaces of one specimen are used.
Dense material is not suitable for frottage. It is better to work with writing paper, use pencils of varying softness or wax crayons, pastels. However, this does not mean that the more tender the better. A very soft pencil that covers rather than shows the relief. You can try to stroke in different directions - the effects may differ significantly. Rubbing is done with caution: you should hold the paper sheet without moving the silhouette underneath it. Second option: to prevent the leaves from moving, you can glue them to paper (on the back side of the picture, and then draw them with crayons different color. The tones with which the plane is shaded to obtain an artistic result complement and cover each other.
12. Zentangle and doodling.
Combination (zendoodle) is a drawing technique that has recently become very popular. Interest in them is due to the fact that they are in a good way relax, have fun, show your creativity, even if you absolutely do not know how to draw in the classical sense of the word.
These techniques are great for both adults and very young children who are just learning to hold drawing utensils.
DOODLING (from the English doodle - unconscious drawing) is drawing using simple elements (circles, squiggles, diamonds, dots, sticks, etc.). This is what ease is all about. However, these simple elements can create complex compositions that amaze the imagination. But basically this is an unconscious drawing that allows you to “turn off your brain,” which opens the way to pure creativity, not constrained by rules. Many of us indulged in this kind of drawing during boring school lessons. We don’t know and don’t think about what will happen in the end; the hand draws on its own. Will it be various plants, non-existent worlds, or just geometric figures- doesn't matter. The main thing is to enjoy the drawing process
ZENTANGLE (from zen - poise, calmness and rectangle - rectangle) is a combination of meditation and drawing. Traditionally, squares of 9x9 cm are used to draw zentangle. Any design is placed in the square, or it is arbitrarily divided into segments, which, in turn, are filled with various elements of the same type (dots, circles, diamonds, whatever your imagination allows). Zentangle helps increase composure, concentration, promotes psychological relaxation, internal calm, improves visual coordination and fine motor skills, and also develops creativity and creativity. A mixture of these two techniques - Zendoodling - is ideal for classes with children. The simplest option is to use a coloring sheet or outline of an animal, flower, bird (anything, drawn on a stencil), and invite the child to fill it with simple elements, and then color them. You can complicate the task - break the drawing into parts and fill the resulting segments with different patterns. More An option is to invite the child to fill in the same images of animals, objects, etc. in different ways.
13. “Imprint” We will draw dandelions, but we will not draw in the usual way. This method is called "Fingerprint". You need to take a leaf from a flower and apply paint on it Green colour, then take this piece of paper, turn it over and print it on Blank sheet paper.
Then we take the flower itself and apply paint on it only yellow color and we also make prints with flowers or crumple a paper napkin into a ball, dip it in yellow paint and put a print on the paper.
14. “Drawing with soap bubbles” Place a spoonful of gouache in a glass and pour in liquid soap mixed with water. We take a cocktail straw and start foaming the solution so that the bubbles rise in the glass. When the foam has risen, take thick paper and lean it against the soap foam. This way, you can go through all the colors with one sheet of paper. For creativity, it is better to take thick paper. The resulting prints can be completed and made into a painting,
15. Drawing with a fork “Hedgehog on the forest edge” Let's get to work. The sheet of paper should be positioned horizontally. In the center of the sheet, using a brush and brown paint, draw an oval; without waiting for it to dry, lengthen it on one side, highlighting the nose. Next we will need a fork and green gouache, we draw the grass while our hedgehog dries. We completely dip the fork into the paint and use the application technique to leave imprints. It is also possible for the prints to extend onto the hedgehog, this will give an idea of the versatility (hedgehog in the grass). We wash the fork thoroughly; then we will need red and yellow gouache in our work. Using the same technique with a fork and paint, we plant flowers on some blades of grass. Now you need to make needles for the hedgehog. Repeating the same steps, only using black gouache, we draw needles for the hedgehog. We are moving on to the final stage of our work. We finish painting our hedgehog’s eye and nose using a brush and black gouache.
Conclusion
Children really like unconventional ways of drawing. This promotes development creative thinking, imagination, creativity, expanding ideas about the world around us and, like regular drawing, develops fine motor skills of the hand, trains the muscles of the hand, and prepares the hand for writing.
Non-traditional classes
Lots of ideas included.
Sometimes provocative
But interesting for children.
They combine in an unusual way
Material and tool.
And everything works out great
And there are definitely no indifferent people!
Result: Dear Colleagues! Our master class has come to an end. I see wonderful works using unusual techniques. And now I invite everyone to take a photo together as a souvenir of today’s meeting.
Thanks everyone for your attention!
Hi all! We continue to provide interesting ideas for educators, parents and teachers. And today we will talk about unconventional drawing techniques. These ideas are suitable for kindergarten and school. Unconventional drawing does not mean something complicated. On the contrary, it is the unconventional technique that turns art classes into simple and fun fun. There is no need to draw complex elements, no need to masterly use a brush. Non-traditional techniques were CREATED because they SIMPLIFY the child’s work and EASIER the teacher’s task in methodological terms and give the child an amazing creative experience with an excellent final result. You will see what beautiful pictures and drawings can be made using simple non-traditional drawing techniques. The child will love your activities - he himself will be drawn to art when he feels that he can create beauty with his own hands.
I have divided all the techniques of non-traditional drawing into SEPARATE GROUPS - and I will explain and show everything in order.
Unconventional drawing
PALM PRINTS
In kindergarten, during art classes, it is important to choose work that will be feasible for younger children. In the second younger group, children have poor brush control, it is difficult for them to force the brush to draw a line, an oval, a circle... Therefore, at this age, quick and beautiful drawings using the palm painting technique are interesting.
With your children's hands you can draw such a cute family of a hen and chicks.

Green paint will give you a print that can be made into a frog. The eyes can be drawn separately on white circles of paper (by the teacher themselves) and the children will simply glue the eyes onto the drawing with PVA glue.

Here is another example of an appliqué drawing using this non-traditional do-it-yourself painting technique. If we add the side wings and sharp tips of the ears to the palm print, we get the silhouette of an owl. The background for such a craft can be chosen from black cardboard, and a large circle of yellow paper(moon). And already against the background of the lunar disk, make an owl-palm print. And then when the print dries, we add a long branch on which this owl is sitting.

The palm acts as a template - first sketch, trace the palm on a piece of paper, and then try to draw an eye here or there. And look closely and see which character is looking at you.
Same for crafts using the non-traditional technique “Palm + paint” you need to prepare the background in advance. Or use colored paper to create a green lawn and a pond for ducks. Or draw in advance - tint the sheet blue and green paint, dry and prepare for class (hold under heavy pressure from books).

As you can see in the photo below, you can add overlay parts to the palm element of the design - appliqués made of paper and other materials. Below is an example of how ordinary gray paper from a box can become a prototype for a craft. To make it easier for a small child to draw circle-face of a lion- give him a jar lid template. Let the children trace the round lid along the center of the “cardboard mane” with a pencil and then carefully fill in the circle with paint – first tracing with a slow brush along the edge of the line, and then painting in the middle. We complete the black details of the mustache, nose and ears with a marker (the teacher himself once the craft is dry).

In non-traditional palm painting, images of birds are often used. Here's a simple idea for drawing a sparrow in kindergarten. It's easy and quick to draw with your own hands for children in the middle group.

Here are some ideas for non-traditional hand drawing for middle and high school children. Craft MONKEY. Here you need to position your palm correctly - so that your fingers are turned towards the vine on which the monkey will hang. Then use a brush to draw a beautiful tail curl. And then lay out the head from the paper appliqué.

But here is a class on non-traditional drawing for the older group - here you need to first draw a tree (trunk, branches, leaves). The leaves are just marks from a brush (press the brush sideways. Raise it sharply up so that the mark does not smudge). While the children are busy drawing the leaves, the trunk will dry out well and the imprint of the koala bear will be perfectly placed on it, as if against a dry background. A beautiful craft for both kindergarten and school (grades 1-4).

And here is a beautiful bright craft-drawing of a GIRAFFE. Here we also see a base made from a palm print. But a long neck element with a head is added to the picture. Before applying spots and strokes of the mane, you need to wait until the red base has completely dried. The mane is placed with the imprint of a brush - we place the brush on the side and sharply lift it up, the impression is obtained as a tuft of mane hairs - we create a lot of imprints along the entire cervical ridge of the giraffe. .Round spots are easier to draw with a cotton swab (with a brush, the circles will not be even - not all children know how to draw a circle with a brush - this is a complex technique that they will master after they learn to write letters).

For the older group of kindergarten, a hand drawing in the form of a rainbow magical unicorn is suitable. Great craft for girls. The teacher will draw the horn.

And boys will love the drawing in the form of a dragon - also in this technique.

Also, young children really love group crafts. Where the entire kindergarten group participates in one common artistic work. For example, on a large sheet of paper, draw the outlines of the future body of a peacock - and around it line up the imprints of the feathers of its magnificent tail. And then, when the tail is dry, you can glue the body itself along the center.

Drawing WITH FORKS.
non-traditional technology in kindergarten.
Disposable plastic forks are a tool that can create an interesting non-traditional drawing technique for you. All drawings where needed characteristic shaggy stroke, even a small child will be able to draw quickly and easily.
Here is a sample of such work for children in kindergarten. The teacher draws a tree stump on a piece of paper. It comes from the hemp the upward line is the AXIS of the future tree. Using a fork, scoop up the thick paint and apply prints from the side of the axle downwards. First we process right side from the axis, then to the left from the central rod of the tree.
And already the third stage - we put another layer of CENTRAL STROKES on top of these strokes - this time more vertically down from the center, slightly diverging to the sides.

For comfort Pour the paint into bowls - jar lids work great.
AND to reduce paint consumption , gouache can be diluted with PVA glue - one to one, or in another proportion. Valuable advice– do not buy SCHOOL PVA in small tubes – go to a hardware store and buy a liter (or half-liter) bucket of PVA glue. It will be called universal PVA, or construction PVA - don’t let this confuse you. By chemical composition it is exactly the same as school PVA glue. But the price is 5 or 10 times cheaper. And in a bucket the glue does not lose its freshness, as in a tube. And a liter bucket is enough for a kindergarten group for 3-4 months of active classes.
In such an unconventional technique, you can draw any PINKY elements of the picture - for example, a HEDGEHOG or a CACTUS.

A fork will also help you draw shaggy characters. For example, a yellow fluffy CHICKEN, or a kitten, or a bear cub.
Since the paint already contains PVA glue, you can glue any paper parts (beak, eyes, ears, tails, etc.) onto the wet paint that has not yet dried.


Also, the fork stroke is similar to the plumage of birds. Therefore, you can make a drawing of any bird using this technique. This is how it happens, you can see in the photo of the craft below - COCK..

TRAINING METHODOLOGY – classical.
On two drawing samples.
What is the best way to TEACH DRAWING in kindergarten. Here is a technique that has been working great in kindergarten for several years. This technique allows you to get the CORRECT one the first time children's drawing. Let's look at it using the example of the same COCK from the picture above.
STAGE 1
We seat the children on a chair (in 2 rows) in front of one table. The teacher will do a demonstration on it. The piece of paper already has the outline of a rooster drawn in pencil. Three bowls contain different colors – yellow, red, blue. Each color has its own fork.
In front of the children, we begin our work - we draw feathers with a fork, freely mixing paints. We show you what is wrong and what is right. Let the children see from your example that it is better to draw lines ALONG the neck, and ALONG the lines of the tail, and not across.
STAGE 2
We painted feathers for one rooster in front of the children. Now we make him a friend - we take another sheet with a pencil rooster, and ask the children, “What should we do?” Children give you hints, you “mess up”, children correct you, tell you how to do it - you correct yourself and continue to make mistakes, then correct yourself. Now children are already acting as a “knowledgeable teacher”. After this game of drawing the second rooster. The children themselves sit down at the tables, where the same pencil rooster is waiting for them and, with knowledge of the matter, each perform their own craft.
As you can see, the demonstration method always works better on 2-X training drawings with the teacher’s hand.
- The first drawing, where the teacher does everything himself (teaching and explaining to the children)
- The teacher performs the second drawing according to the children’s prompts (“making mistakes” and correcting them).
- Each child already makes the third drawing himself, at his desk, with a smart, scholarly look.
Unconventional DRAWING
FEET PRINTS
The imprint of a child's foot, like a palm, can be turned into interesting drawing. A variety of characters can be hidden in a child's footprint.

These are the kinds of paintings that can be created using an unconventional drawing technique from an ordinary print of a child’s foot.


I’ll say right away that in the realities of a kindergarten (where there are 30 children in a group) This kind of drawing with feet is difficult to organize. In the case of drawings with palms, everything is simple: children wipe their palms with a wet cloth (remove the main layer of paint), and then go to the sink and wash their hands with soap. When drawing with feet, the child cannot go and wash his feet in the washbasin. A gentle man with soap and several basins to wash his feet. You can’t do this kind of work with a whole kindergarten group. But…
This kind of drawing can be done as a specially organized individual lesson. Children are divided into groups of 4 people. One child gives his feet for a print, the second draws eyes, ears, tails, the third child draws grass, the sun, the fourth a tree, a bird and so on... (depending on the theme and plot of the picture).


You can try this option for organizing the entire process. Before bedtime, when children are barefoot. Let the child step on a piece of foam rubber soaked in paint. And then straight onto a sheet of paper. And then immediately a thin, wet, soapy terry towel, then into a basin with some water... and go to bed.
That is, you need to buy a sheet of foam rubber(it’s cheap in the construction department, sold cut into meters). Wet the foam rubber, dilute the paint slightly with water so that it is well absorbed into the foam rubber (like ink in printing), place a sheet of foam rubber on a plastic tray. Nearby, on a second plastic tray, there is a wet, soapy towel (for wiping off paint), then there is a basin of water, and a dry towel. There is a chair next to each tray and basin. Three chairs + three elements (coloring, soap, rinsing, wiping).
It turns out to be a conveyor– the child sits on the first chair (steps on the foam rubber with paint, hop – raises his leg), move the tray with the foam rubber, put a sheet of paper in its place (hop – stamped). The child moves his butt to the second chair, next to which there is a tray with a soapy towel (hop-up, soaped his leg, wiped off the paint). The child moves his butt to the third chair, next to which there is a basin of water with a rag floating in it (hop, wash off the soapy leg where you need it with a rag). And wipe with a dry towel.
Everyone is happy. Except for the sanitation station. It does not allow collective rinsing in one basin. The sanitation station requires for 20 children - 20 basins, and 20 soap towels... 20 dry towels)))

Unconventional drawing
HATCHING method
And here’s another beautiful piece of equipment for kindergarten. Where the elements of the drawing are created using the shading method. This results in an interesting image texture. This method is convenient for drawing everything fluffy and shaggy.
The technique is well illustrated by the example of this HARE craft.
The hare drawing is divided into ROW-SECTORS, each of which is shaded. We get even rows of shading.

Here is a life-size template for this craft.

You can modify this craft and present it as an applique. Where each element is cut out separately (ears, forehead, cheeks, nose, neck). Then each element is shaded. And then everything is assembled into a single whole application.

The ZONE HATCHING method can be used to create any other furry characters. For example, a fluffy ostrich.

That is, the teacher gives the child a piece of paper on which the eyes and beak of an ostrich are drawn. The child’s task is to draw a fluffy cloud of strokes around the eyes with a pencil or wax crayons. And then, under the resulting fluffy ball, draw the neck in rows of strokes. The teacher can help the children by drawing the circle of the ball of the head and the lines of the future neck, and dividing the neck into sectors for striped multi-colored shading.

You can come up with any character and design it in the form of SECTORS with shading - a cat, a parrot, a dog, and so on.
DRAWING in kindergarten
WITH A COTTON SWIP
(non-traditional technique).
In kindergarten, we all drew the FLUFFY DANDELION craft using cotton swabs. Here it is (photo below). Let's think about what other pictures can be drawn using a cotton swab.

Although even from a simple DANDELION theme you can create an unconventional design - BRIGHT JUICY, as in the photo below.

It is best for young children to draw only SOME ELEMENTS of the characters using the technique of POKING WITH COTTON SWIPS - only the tail of a fox, the tip of a needle for a hedgehog.
That is, a kindergarten teacher combines the work of drawing watnyo with a stick with appliqué. First, on a piece of paper, the child makes an applique of the hedgehog’s face (from brown paper) and the skin of the hedgehog’s back (from white paper). And then this back skin needs to be completely covered with multi-colored cotton swab prints. A fun children's drawing and sticking activity.

You can use drawing with a cotton swab using the ZONE FILLING technique. On a sheet of paper, draw the outline (silhouette) of a character in pencil - for example, a seahorse. The child must fill this entire area without leaving empty spaces or going beyond the pencil border. This is difficult, the child does not always see where he is thick and where he is empty. The teacher needs to repeat all the time: look for empty holes, fill the holes with different colored dots, and not dots of the same color.
The brain, attentiveness, fine motor skills, and a sense of color work here. After all, you need to feel how you distribute the color across the zone - evenly or everything is yellow at the top, and everything is blue at the bottom.
Such a task can be started in the younger group and then in the older group - and even an adult can learn something in such training on the sense of color and composition.

You can also use a cotton swab to make CHAIN PATTERNS. Like the rows of rings on the cacti below.

You can also draw entire pictures with dots. This non-traditional drawing technique can be called DOT GRAPHY.

The most interesting thing is to select points different shades and place them differently on image objects.

You can start working on this type of drawing with small tasks. Pieces of landscape, elements of architecture.

There is an artist Angelo Franco who paints paintings using the POINT TO POINT technique. Here are large points, contain smaller ones inside.

With a cotton swab and paints you can draw beautiful MANDALA (photo below). Mandalas are circular patterns, symmetrical and multi-colored. The homeland of mandalas is the East. They still lay out patterns of colored pebbles, colored sand, or flower petals.

For children, we must provide ready-made graphic templates-mandalas, with a given pattern. And the child’s task is to REPEAT EXACTLY every POCK with a stick in each of the symmetrical zones of the mandala. That is... if in one zone you made 2 yellow pokes on a petal, then in the other zones you need to make 2 yellow pokes, on the same petal, in the same place on the petal.

You can find many round mandalas for painting on the Internet. Choose those that are simple and easy to do for children of a given age.

You can draw dotted mandalas on plastic plates. As in the photo below.
You need to start drawing mandalas when the child has already mastered basic counting to 5. And can count the number of PUMPKINS in each ray or in each row of the mandala (if it is a row-ray mandala, as in the photo below).

Agree, this beautiful and unconventional drawing technique perfectly develops a child’s mind, his mathematical abilities, constructive thinking, the ability to plan the result, and calculate the drawing.
Drawing WITH A WET EFFECT.
(non-traditional methods).
Here's another unconventional one watercolor technique drawing. Here we put watercolor diluted with water on a sheet of paper and blow on it from a tube. We get watery spots and colorful streams. For such drawing it is not necessary to use watercolor; the same can be done with gouache diluted with water.
Below we see how this technique can be used in art classes in kindergarten and school. We give the child a drawing of a face (boy or girl) and the child’s task is to blow out the HAIR for these characters.

You can use a board on which you attach a sheet of paper with a clothespin. We place a large drop of paint on the edge of the sheet and lift this edge of the board up so that the drop flows down like a slide.
If we temporarily seal part of the sheet with a piece of masking tape, then we will have an empty, unpainted space on the sheet. And then in this place you can place an applique of someone under an umbrella. Here's how it's done in the photo below.

In the younger group of kindergarten, children will really enjoy drawing Klaks monsters. Krakozyabra can be inflated from a tube in any direction. And then, after drying, glue applique elements onto them.

Now I want to introduce you to another technique - SOAP + PAINT. Pour regular liquid soap into cups, or liquid for soap bubbles— add a little gouache to each glass. We get multi-colored soap paint. Dip a cocktail tube or a round “blower” into it and blow bubbles directly onto the paper. We get gentle bubble CLOUDS. They can be decorated into an interesting picture.

The bubbly clouds can be LUXURIOUS PEONIES (like the photo below). Blistered areas can be scalloped on sea waves like curly sheep skin, etc.

You can simply blow bubbles onto the surface of a sheet of paper with a straw, and then cut out a craft applique from this multi-colored sheet. An interesting idea for activities in kindergarten.

You can also draw with splashes - just SPRAY on paper multi-colored paint. A toothbrush is best for this.

Unconventional drawing
WAX-GRAPHY method.
Here is another technique that can be called CANDLE GRAPHY, or WAX GRAPHY.
Suitable for this technique white candle wax (or paraffin). It can also be a children's wax crayon for drawing (but not just any kind). Choose chalk that has a greasy feel. Check in advance how the crayons work.
Now let's act. Draw a picture on a sheet of white paper with white chalk. Then we take watercolor (not gouache!!!) and begin to apply watery (not thick!!!) paint over the chalk lines. That is, we simply paint over our sheet of paper with colored watery paints and the invisible white wax pattern begins to appear. The paint does not cling to the wax and these places on the paper remain white.

You can draw multi-colored round mandalas in this style (with streaks of different colors). Looks beautiful painted autumn leaves: leaf contours and veins are waxy, and the filling of the sheet is multi-colored (red-yellow-orange).

The night rain over the water looks beautiful. Slanting lines of rain, diverging circles on the water - it's all wax. And then we paint it with dark blue paint and get a beautiful picture of rain.
You can use wax to draw jellyfish and sea creatures. And then apply dark (blue-violet-black) tones and the sea depths will come to life.

Children are delighted when you offer them such an activity. The educator or teacher himself draws jellyfish, turtles, small tadpoles and amoebas on each sheet in advance. And then the child must find out who lives in the depths of the seas. He paints a sheet of paper and all these creatures appear under his brush.
Important rule. Before class, teach the children to ROSE a sheet of paper with a wet brush, and NOT TO RUBB THE SHEET WITH A BRUSH, LIKE A WASTE SPASH. Otherwise, the wax pattern may be damaged.
NIGHT pictures look beautiful using this technique. Using wax we draw one horizon line, then waves, a wax lunar path and the disk of the moon on the upper half of the sheet. Now we paint it in the colors of the night and get the sea, the moon and the white lunar path.
WINTER pictures also look good. White lines of wax drawing as elements white snow, outlines of snowdrifts, silhouette of a snowman, snow-covered huts - we draw all this with wax. Then the child applies blue or blue paint and a winter landscape appears on the leaf.
But it's important– before giving these pictures to children, check for yourself whether the wax is of suitable quality. Are the lines of the design showing? What layer of paint should I apply (what is the degree of paint dilution with water)?

Unconventional drawing
Using the PRINT technique.
All children love this drawing technique. Because it gives quick and beautiful results for every child. Even the most inept artist can produce beautiful paintings. Children perceive the whole process as magic, exciting game with the magical effect of a picture appearing
In kindergarten, it is most convenient to organize the imprint technique. Let's see what materials are suitable for implementing this technique when drawing with children.
OPTION 1 – a lump of crumpled paper.
Crumpled paper gives a beautiful torn texture to the print. This is suitable for drawing the crowns of spring (yellow-green or pink) and autumn (orange-purple) trees. Paint is taken from jars or watercolors and dripped onto a bowl (lid from a jar). Dip a napkin into this drop, try the imprint on a rough sheet and, if you like, transfer it to paper.

OPTION 2 – corrugated cardboard.
Packaging gray cardboard is great for drawing a rose using the imprint technique. Slice cardboard box into strips across the corrugation line. We twist the strips into a tube and secure with an elastic band or thread. We make a stamp for a green leaf from a toilet paper roll.
Also, this method of ROLL Drawing is suitable for depicting a SNAIL SPIRL. You can also make LAMB SKIN CURL.

OPTION 3 – fluffy pom-poms.
In craft stores (or on craft websites) you can buy a bag of these soft pompoms. If you attach a clothespin to each, you will get a convenient holder for work. Using the pomponography technique, you can create decor for painting flat parts of crafts. And also paint pictures of white airy dandelions in watercolors.

OPTION 4 – toilet paper roll.
There are a lot of options here, because the tube-sleeve can be given different shapes. You can cut the sleeve in half Lengthwise, and we will get a half-ring stamp - an ideal stencil for drawing fish scales or tiers of coniferous legs of a Christmas tree.

A round roll can be flattened on both sides and you will get a pointed oval - this is the shape of a flower petal, or bunny ears. Great idea for non-traditional drawing in kindergarten with younger children (bunny) or older children (flower).
The flower is more difficult than the bunny because you need to RADIALLY arrange the petals around the middle of the flower.

You can also cut the EDGE OF THE ROLL into curly petals - and you will get ready-made petals for paintings. Such stamps are simply a godsend for quickly drawing bouquets and flower beds for younger children. And even for the smallest babies in the nursery.

OPTION 5 – bubble wrap.
Packaging film with bubbles also gives an interesting print pattern, which can be used in non-traditional drawing in kindergarten. For example, make an imprint of a honeycomb (as in the picture below).

Or make a drawing of a spring or autumn tree.

OPTION 6 – potato stamps.
You can cut stamps of any shape from potato halves. Cut the potatoes in half. Wipe the wet cut of the potato with a paper napkin. On the cut using a marker we draw the outlines of the future stamp. Cut with a knife along the drawn contours.
It is better to choose oblong, elongated potatoes for stamps. So that a child's hand can comfortably grasp the potato. Below in the photo we present only two topics for such unconventional drawing - owls and tulips. But you can come up with your own options. If you add PVA glue to the paint, you can glue details (eyes, nose, handles) on top of the prints.

You can make an experimental double stamp. Cut the halves of the champagne out of two potatoes and fasten the two potatoes together by piercing them through with a toothpick and wrapping them with electrical tape or tape. Take a swing at cool idea and experiment with creating stamps for it.
Unconventional drawing
PLUFFY colors.
Here’s another cool material for unconventional drawing, which young children love so much. This is a VOLUME PAINT for creating puffy designs. Making this kind of paint at home is quick and easy - mix PVA glue with gouache in a bowl and add daddy’s shaving foam. We make several of these bowls (not necessarily large ones) based on the idea of what we will draw with the children. For a watermelon you only need two colors - so start with that. Watermelon seeds are a simple black gouache that we drip here and there.

The most different ideas can be embodied in this drawing technique for children in kindergarten. The simplest one is a waffle cone with ice cream. The horn is cut out of rough packaging cardboard, and we draw a waffle grid on it with a marker. The child glues the horn onto a sheet of paper (below) and lays out round balls with a three-dimensional design on it. You can give your child round templates, which he will first trace with a pencil over the edge of the horn, and then foam paint will be placed in these round outlines.

You can also put several spoons of different paints on the horn and then use the opposite end of a brush (or a wooden stick) to mix the paint into multi-colored stains. You will get a beautiful mix ice cream. A great craft for children at school or kindergarten during art classes.

Methods of working with thick paint in children's classes.
You can mix the paint on a separate tray (or on a piece of oilcloth). It’s better when each child makes his own color mixture - so we give each child his own oilcloth.
We put individual oilcloths for children on each table. Place bowls with 4 colors of paint in the center of the table. The child mixes these colors into a common puddle on his oilcloth - to the point of beautiful stains. Then a paper outline of a character (for example, a seahorse) is applied to the puddle. And then he lays it out to dry (the outlines of the skates must be signed with the child’s name in advance, and do not forget to remind the children to apply the unsigned side to the paint). Then the next day, when the foam paint has dried on the silhouette of the skate, you can continue working and make an appliqué of the skate in the sea waters, add spikes and algae around it, stick on shells, and pour sand on the glue.

You can try these interesting drawing techniques while working with children, both at home and in the garden. At school it's unconventional drawing can be carried out in visual arts lessons, leaving the whole process to the child for independent creativity.
On the pages of our site you will find many more different techniques For unusual drawing paints.
We already have detailed, detailed articles on the topic:
Good luck with your creativity.
Olga Klishevskaya, especially for the site
Good websites are worth their weight in gold, you can support the enthusiasm of those who work for you.
Valentina Kurgaeva
Summary of a lesson on non-traditional drawing techniques “Summer is coming”
Target: introduce children to crumpled paper painting technique, development of artistic and creative abilities and perception.
Tasks:
Development of creative thinking and imagination.
Development of fine motor skills.
Evoke an emotional response to new way Images.
Foster a caring attitude towards nature.
Cultivate neatness.
Material: tinted paper, gouache of different colors poured into small plates, paper leaves different sizes.
Progress of the lesson:
Educator: Guys, what seasons of the year do you know? (children's answers).
Summer is coming, how did you know what would happen summer? (children's answers).
For spring comes summer. Both people and plants are waiting for him.
All the fields, meadows are in flowers
As if wearing colorful scarves.
We love it very much for this
Our sunny... (summer) .
Educator: Guys, guess puzzles:
You warm the whole world
And you don’t know fatigue.
Smiling at the window
And everyone calls you... (Sun)
Fluffy horse,
Or maybe a hippopotamus
Or maybe just cotton wool
Floats above us into the distance. (Cloud)
What is the summer sky and sun like? Which of you was in summer in the meadow and what did you see there? What flowers did you see there? (Children's answers).
Finger game:
Multi-colored flowers open their petals
(fingers folded into a fist slowly straighten)
The breeze breathes slightly, the petals sway
(fingers smoothly tilt left and right).
Multi-colored leaves cover the petals
(fingers slowly form a fist).
They shake their heads and quietly fall asleep.
(fists swing slowly and smoothly from side to side).
Educator: Let's look at a picture about summer. Which summer is bright, warm. The sun is shining brightly, white clouds are floating across the sky, and different flowers are blooming in the meadow.
Let's draw summer! Take several pieces of paper of different sizes and crumple them into lumps. We dip the lumps into plates with paint and press the lumps onto a sheet of paper, leaving imprints in the form of the sun, clouds, and grass. Then we draw colorful flowers.
Guys, look what wonderful drawings we made!
Publications on the topic:
Summary of an integrated lesson on non-traditional drawing techniques, with the “Turnip” stamp Tasks: 1. Remind the kids of the content of the familiar one.
 Program content: 1. Introduce children to a new drawing technique - scratching (scratching); 2. Consolidate and generalize children’s knowledge.
Objectives: 1. To introduce children to the new technique of drawing “with cotton wool on velvet paper”. 2. Develop children's creative abilities. Z. Call.
Summary of an open lesson on non-traditional drawing techniques in the second junior group “The sun that shines for me” Goal: Continue to introduce in an unconventional way palm drawing. Objectives: To develop color perception and visual-motor skills.
Summary of a lesson on artistic creativity using non-traditional drawing techniques (with toothpaste) “Winter Landscape” Goal: to teach children to draw a winter landscape using an unconventional technique with toothpaste. Objectives: Educational: introduce students to non-traditional.
Lesson notes on non-traditional drawing techniques Lesson for the younger group: “Multi-colored palms” Purpose: to form ideas about the world of love and good feelings; develop desire in children.
Summary of a lesson on non-traditional drawing techniques in the first junior group “Hedgehog” Lesson notes on non-traditional drawing techniques. In the first junior group. Topic: "Hedgehog." (drawing with cotton swabs) Purpose: 1. Continue.
Goals:- Introduce photocopy drawing techniques.
- Formation of skills in the technique of drawing with a candle.
Tasks:
developing attention by observing frost patterns in winter;
fostering interest in winter natural phenomena;
instilling accuracy in execution.
Equipment: patterns samples, album sheet; additional sheet, piece of candle; watercolor paints; wide bristle brush; a glass of water, napkins, a letter.
1. Organizational moment.
Psycho-gymnastics: “Ray”
Reaching for the sun
They took the ray
Pressed to my heart
And they gave it to each other.
Report the topic of the lesson.
Guys, today the topic of educational and organizational activities is “Frosty Patterns”, and not just an activity, but drawing with a candle
Surprise moment.
Guys, what time of year is it now? Children answer winter
It's winter now. Winter is a wonderful time of year! Various miracles happen in winter! So I received a small parcel. Who sent it to us?
Let's see what's in it, maybe we'll find out who it's from.
Reading the piece of paper attached to the parcel
Guys, here is a snowflake with a riddle poem. Listen carefully to guess it. Whoever guesses it will raise their hand:
Stars fall from the sky and fall on the fields.
Let the black earth hide under them.
Many, many stars, thin as glass;
The stars are cold, but the earth is warm.
What artist put this on the glass?
And leaves, and grass, and thickets of roses. Children answer that these are snowflakes because they cover the ground with snow and look like stars.
Well done guys, you are very observant, so you guessed the riddles correctly.
Introduction to the topic.
And who is winter’s faithful and irreplaceable helper? Children respond to frost
Right. With the onset of winter comes cold weather. Frost is knocking on every house. He leaves his messages to people: either the door will freeze - they are poorly prepared for winter, or he will leave his art on the windows - a gift from Frost. Let's see what kind of messages he sent us
I take out pictures from the parcel - depicting frosty patterns
What is shown in the pictures? Children answer Twigs, snowflakes, ice flowers, curls and hooks of cold
That’s right, there are kids here and the spruce branches are decorated with frost.
This is how Frost painted our windows without brushes or paints.
Guys, how do you think Moroz draws these patterns? Children make their own assumptions. Blows cold air on the glass, magically throws snowflakes onto the windows, and they stick to the window.
In fact, from the cold, frosty air, droplets of water that are present in the air settle on the cold glass, freeze and turn into pieces of ice - needles. During the night, many, many of them are formed, they seem to build on each other. And as a result, we get different patterns that we just saw.
Guys, do you think we could draw patterns in such a way that at first they were invisible, and then suddenly appeared, like Frost’s? No.
But it turns out it is possible. And now I’ll introduce you to this method of drawing - it’s called “photocopy”.
2. Practical part.
Take the candle pieces in your hands and try to move them along a sheet of paper.
Does the candle leave visible marks? Children answer No
Now cover the top with any watercolor paint. What did you get? Lines appeared under the paint, which we drew with a candle.
Guys, why do you think the lines made with the candle weren’t colored? Children express their opinions
The candle consists of wax, which repels water, so a design made with a water-repellent material appears after applying watercolor paint diluted with water. Today we will try to create a miracle - we will draw Frost patterns using a candle.
Where do we start drawing? Children answer by drawing from the top, going down.
That's right, in order to ensure that the drawn elements do not overlap each other, it is best to draw the pattern from top to bottom. Cover the finished drawing with watercolor paint. I would advise choosing blue or purple. To prevent the sheet from getting wet, apply the paint evenly over the entire sheet, but do not apply it over the same place several times.
3. Independent work of children.
I provide individual, dosed assistance
4. Summing up
What guys is the name of the painting technique we used to create such beautiful works? Children answer photocopy
What else do you think can be drawn using the photocopy technique? Children respond with flowers, patterns, sun.
Our lesson has come to an end, I am very pleased with you and I really want to know what surprised you today? What did you especially like today?
Drawing lessons for younger students
Master class on drawing. “In a flower meadow. Ladybug"
Purpose: A series of drawing lessons for primary schoolchildren “In a flower meadow”: “Ladybug”, “Bee” and “Butterfly”
Drawings can be used to decorate the interior or participate in a competition, or as a gift.
Target: development of children's creative abilities through artistic and visual activities.
Tasks:
teach children to draw expressive image ladybug in a flower meadow
strengthen children's skills in working with wax crayons and watercolors;
develop spatial thinking and imagination;
show children the possibility of creating a panoramic collective composition from a large number of drawings, cultivate interest in co-creation;
to cultivate the ability to see the beauty of nature, to understand its fragility, to evoke a desire to protect
The nature of our planet is our wealth, which we must appreciate. Our task is to preserve all the diversity and richness of nature. Let us admire our nature as a song! Let's become her friend and take care of her!
After all, protecting nature and preserving it means loving your native Earth.
Have a carefree summer
Golden time
Festival of sun and light
Gives joy in the morning.
Nothing is more beautiful
In the grove of birds singing,
Yellow-eyed daisies
Snow-white eyelashes.
Cornflowers bright blue
In the emerald grass
And lilac haze
Above the river at dawn.
Ripe raspberries
Sweet juice on lips
As a sign of July
In the forests near Moscow. (I. Butrimova)
How nice it is in the summer on a green water meadow! Among the lush grasses, there are bright fragrant flowers. Elegant butterflies, bees and bumblebees flutter above them.
Among the magical space
I'll get lost from the soul!
There is so much beauty here, here is the kingdom
Have a wonderful fairytale dream!
The whole meadow is replete with fragrance and breathes,
Bees and bumblebees sing here,
And the butterflies are in the highest whirling
They are looking for those flowers in delight,
That they are given the sweetest nectar! -
How delightful everything is here! -
The flight of the soul is the highest here! -
His name is happiness! (N. Klubnichkina “In a flower meadow”)
Today is the first lesson. You will learn the plot of our drawing from the riddle rhyme:
I'm a harmless bug -
neither an ant nor a cockroach!
I don't moan or butt,
although I call myself a cow!
Mustaches instead of horns
on the back, like beads,
black peas,
as if abandoned by someone.
I'm a ladybug
I'm sitting on chamomile!
There are a lot of us
we are all like twins!
Carrying me away
to the wildflower
red wings
to the black dot! (N. Ileva “Ladybug”)
That's right, we will learn to draw a ladybug on a daisy. From time immemorial, chamomile has been a symbol of Russian nature. Among the ancient Slavic people, it was considered one of the 7 sacred plants - hazel, chamomile, oak, hops, weeping, willow and mistletoe.
The name chamomile comes from Latin word, meaning “Roman” when translated into Russian. In the medical literature of the Middle Ages it was called “Romanov’s flower.” IN Ancient Egypt The chamomile was dedicated to the sun god Ra. And the Greek name translates as “white color ok.”
For work we will need: album sheet, colored wax pencils, brush (squirrel or pony No. 2), water glass, watercolor.
Place the album sheet horizontally. Let's start working from the center of the sheet.
First stage.
Take a red wax pencil and draw an oval. Let's draw an arc in the middle.
Using a black pencil, draw an arc - this will be the head. On the red oval, in random order, draw small circles and dots.
Let's draw eyes and antennae. Our ladybug is ready.
Using a yellow wax pencil, draw an oval. This will be the middle of the chamomile.
We begin to draw the petals with a blue pencil. In shape they resemble elongated ovals of irregular shape.
Let's complete the composition with green leaves.
Second phase: let's decorate our drawing using watercolors. Let's start with the ladybug. I suggest taking two shades of red. In my case, this is dark red kraplak and scarlet watercolor.
We will draw “raw”. To do this, you need to moisten the desired area and inject paint there. The watercolor itself will begin to spread across the water in a random order, and adding an additional shade will create a unique pattern. The main thing is not to mix the paint, but to let it spread on its own. The wax pencil will hold water and paint in the area of the drawing we need.
Paint the ladybug's head with black paint.
For the center of the chamomile, I suggest using three watercolor colors: golden ocher, yellow and orange.
Wet the entire yellow oval and apply yellow watercolor around the edge. Then we will add golden ocher and finally orange.
A real chamomile has snow-white petals, but in our drawing they won’t turn out that way (unless you paint it over, but then the work will look unfinished). For the petals, I suggest using lemon and turquoise watercolors - in the sun the white color takes on different shades.
Since water dries quickly, I suggest moistening not all the petals, but only four to begin with. Introduce lemon color closer to the center of the flower.
Insert turquoise into the free part of the petal.
Now let’s moisten three more petals and introduce turquoise closer to the center, and a lemon tint around the edges.
Alternating watercolors in this way, paint over the remaining chamomile petals. Changing colors creates volume and gives movement to the petals.
Use yellow paint to paint over the free space between the petals in the center of the flower.
For the leaves we use two shades of green: viridon green and yellow-green watercolor.
This is what our work looks like in general.
Now let's add green grass at the bottom of the leaf. To do this, moisten the bottom half of the sheet and paint it with yellow-green watercolors. Then we introduce viridon green.
Draw a sunny sky at the top of the sheet. To do this, take scarlet, lemon and turquoise watercolors.
Working “raw” we gradually introduce all three colors.
It is the raw drawing technique that can create such smooth transitions.
Let's paint our ladybug's eyes and dots on her wings with purple watercolors.
Third stage: drawing small parts wax pencils. Using a dark green pencil, draw the veins on the leaves and you can outline the leaves.
Below we will draw blades of grass.
Our drawing is ready.
I'm sitting on a bench, looking at a daisy,
A funny little bug wanders quietly through it,
Six legs, whiskers and a red back,
There are three spots on the back - God's little beast:
I will NOT tell fortunes using chamomile today!
After all, where can a beautiful Bug crawl then?....
I will carefully take the chamomile by the stem...
I’ll take the handsome Bug to the meadow,
There are a lot of daisies there! And clover and porridge!
Her MOST FAVORITE BUG is waiting there!!! (Irina Il “To the ladybug!!!”)
If you put all the children's works in one row, you will get a whole chamomile meadow with ladybugs (panoramic teamwork). Or you can put the drawing in a frame and give it to someone.
Ladybug - red bug,
The daisy sat on a petal,
Fashionista of the field - daisy, so glad
Red brooch on a white outfit.
He nods his head to his girlfriends:
“Look! Look! Now it will fly away!” (L. Aleinikova “Red Brooch”)
Here are some children's works.
I wish you creative success!!! Until we meet again in the flower meadow.
Why do you need this kind of drawing?
- Unlike traditional drawing, a child has much more opportunities to show and develop his creative abilities, fantasy, and imagination.
- The child learns to work with different materials.
- By feeling materials and textures, he develops fine motor skills.
- In the process of work, the child becomes familiar with volume, texture and space.
- The child works with color, learns to mix and match colors, and develops artistic taste.
- Unconventional drawing calms and captivates, promotes the development of perseverance, and encourages the search for non-standard solutions.
- There is no word “impossible” in this type of activity. We saw cones, leaves, berries, a tea bag - all this can come in handy.
- Drawings using non-traditional techniques are obtained much faster than conventional ones. This plays a huge role for young children when they lack perseverance and patience to complete their work.
- Such activities add confidence in yourself and your abilities, and simply bring great pleasure.
Drawing with fingers and palms
This is usually the first technique with which children begin to draw even before going to school. kindergarten. The drawing comes out very quickly, and this is extremely important when working with very young children. Dip your child's hand into the paint and let your child make an imprint on the surface. See what it's like. Perhaps it is some kind of animal? Ask your little one what needs to be completed to get the finished image. Maybe ears, nose or tail? the missing details can be drawn with your fingers. It is much easier to control your fingers and palms than a brush. And therefore more interesting for young children.
For this you will only need finger paints. If your child is still very small, don’t even doubt that he will be covered in paint. Therefore, it is better to immediately send him to the bath and give out the paints there. Don't worry about repairs. Good finger paints will be easily washed off both the bathtub and the tiles.
These paints are good, but expensive. One package costs about 500 rubles. He grabs her several times. After all, children do not stand on ceremony with any materials and scoop up not as much as they need, but as much as they can fit into their hand.
Stamps
Also quite a popular technique for early ages. You will need any object that you don’t mind and gouache or any other paint (but it’s better not to take watercolor). The technique is simple - dip the object in paint and make an imprint on paper.
Stamps can be made from apples, potatoes, wine corks, threads, pine cones, shells and many other materials. The easiest way to make this is with potatoes if you have metal cookie cutters. Simply press the mold into the potatoes and carefully trim the excess pieces around the edges with a knife.
It can be made even simpler. Take a small box, glue it with a sponge or cork various materials to the side surface or wrap it with threads in a chaotic manner.
Rollers with a pattern are also of interest. They are sold in construction stores and craft stores.
The leaf prints are especially delightful. Select leaves various shapes, paint them with paint and press them onto the paper. The entire texture of the sheet will be clearly imprinted on the paper.

Drawing with foam rubber
We all tend to think that we can only paint with brushes, but this is not true. For creative works Foam rubber will do just fine. Cut a small piece of a regular sponge and give it to your child. Foam paint prints turn out completely different from brush strokes. They have their own texture and big square coverings. In just a couple of minutes you can create beautiful background using only two or three colors. And using stencils you can create amazing ornaments.

Painting with a hard semi-dry brush
This technique is used for drawing spiky and fuzzy objects. You will need a hard brush and gouache. An unnecessary brush will also work. We don’t wet the brush, we immediately dip it into the paint and paint. This technique will be useful in school when drawing animals. In the meantime, you can show your child how to draw, for example, a Christmas tree.
Drawing with watercolors on wet paper
To do this, you will need a sheet of thick paper (preferably watercolor), the watercolor itself and a brush. Moisten the entire sheet evenly with water so that it is thoroughly wet, but not so that there are no puddles. Put some paint on your brush and start creating. Any stroke spreads one to two centimeters across the paper. Now is the time to show your child how colors are mixed and explain what shades are.
If the paint does not want to spread, then the sheet is dry; if it spreads in all directions, it is too wet. We need to find a middle ground. In this lesson, show your child that all movements are made easily and smoothly. There is no need to press the brush into the paper, as many children like to do. A light touch is enough.
The web in the right picture was drawn using a wax candle. Read about this below.

This technique works well for drawing backgrounds. Especially water. And after drying, you can continue to draw fish and algae as usual.
Wax and watercolor painting
The child draws lines, patterns, etc. with wax crayons, then covers the entire sheet with watercolors. Areas where wax is applied do not overlap with watercolor. It turns out to be quite an interesting background. For the same purpose, instead of wax crayons, use a regular colorless candle. Since the candle lines are not visible on the white paper, the final drawing will be a surprise.

"Blotography" and "spray"
Using the "blotography" technique, children draw paint onto a brush using large quantities, splash on the drawing in a chaotic manner, then try to understand what it looks like. With a sufficiently developed imagination, you can get a whole plot. Details are completed with colored pencils.
The spray technique is similar. Only spraying is done using a toothbrush and a ruler. Put paint on the brush and run it with a ruler towards you. If you do everything correctly, there will be no paint splashes on yourself. But there may well be around the leaf. Therefore, you need to think in advance about what the sheet will be attached to and how to secure the space around it.
"Monotype"
Take a regular sheet of paper. We apply a drawing to one half, fold the sheet in half and get a new drawing. For example, a butterfly wing drawn on the left side will be printed on the right side. The result will be a whole butterfly. During such classes it is very easy to explain the law of symmetry to the child.
Collage
This is not really drawing, but only an intermediate stage. Surely, you have old postcards at home that you don’t need, but it’s a shame to throw them away. It's time to use them. Cut out individual elements and let your child arrange them on the paper. Newspaper and magazine clippings are also suitable for this purpose. After the child decides on the location of the objects, hand him a brush and glue and give him the opportunity to glue everything himself. Ready-made elements will be very useful for children under three years of age. After all, they still don’t know how to draw complex objects, but they will definitely be able to add details to them.
Drawing using sand, grains or sawdust
Theme: "Hello Summer"
Purpose of the lesson:
- Introduce children to a new type of unconventional drawing technique “blotography”. Introduce children to the method of drawing using a tube and the method of finishing drawings using rice and cotton swabs.To develop the ability to independently choose the color scheme of paints that corresponds to joyful summer mood. Develop color perception, improve fine motor skills of fingers and hands. Arouse a positive response to the results of your creativity. INcultivate interest, love and respect for nature.Materials:
Sheets of white paper for drawing Watercolor paints, gouache. Cocktail straw, glasses for straws, rice, glue, brushes, napkins, plates.Progress of the lesson. 1.Creating an emotional mood.
Let's hold hands together
And let's smile at each other
We are not afraid of obstacles,
If we are friendly!
2. Surprise moment.
Educator.
Someone threw it through our windowLook at the letter
Maybe it's a ray of sunshine
What tickles our face
Maybe it's a sparrow
Did you drop it while flying?
Guys, want to know who wrote the letter to us?
"Hello guys!
My name is Lesovichok. Listen to my story. There used to be a lot of forests. But now people do not take care of nature. Therefore, there are fewer and fewer forests. People cut down trees and planted nothing. The rivers and lakes dried up, the animals all died without water. And finally, people realized what they had done, but it was very late. Help me and my forest."Educator:
Guys, can we help Lesovich? Shall we draw a forest?What helps us draw with all these and other objects? (With the help of leading questions, if the children do not answer immediately, get the correct answer - hand and fingers).
Tell me, in order to be prepared for a long one, have an interesting day, feel energetic and cheerful, what do we do in the morning? What are we doing? (charging).
Right! So, in order for us to start drawing, we need to prepare our fingers for work. Let's play with them.
Finger game
Daisies"We are beautiful flowers
(Clench and unclench fingers)
The moths love us so much,
(Bend fingers alternately)
They love butterflies and insects.
The kids call us “daisies”
(Clench and unclench fingers)
Every mother has babies -
(Fingers take turns)
Everyone is beautiful and good.
Educator:
-Guys, do you want to draw? Then take your seats at the tables.What else can you draw with? (Felt pens, chalk, brushes and paints)
Let's all remember and list the seasons together.
What time of year is it now?
Guys, what color is summer? (Children list bright colors, inherent in a warm sunny summer)
What insects do you know that fly only in summer and are very similar to flowers? (Butterflies)
Practical part:
Educator:
They planted a seed, blew through a magic wand, and it began to grow higher and higher. And a tall, spreading tree grew.The teacher explains.
Put a drop of paint on bottom part bring the leaf to the end of the straw, while directing the movement upward, changing the direction - we make branches.
Educator:
What else needs to be drawn? How do you think?Children:
SunEducator:
That's right, we'll paint the sun with rice! Oh yes! They not only cook porridge from it, but also draw. First, apply glue with a brush, let it dry, then paint the sun and rays. See how beautiful it turned out. The sun seemed to be three-dimensional and warm, warm. You can also draw flowers using cotton swabs.Now it's time to get to work.
What needs to be done to make the drawing beautiful?
You need to try hard and do the drawing with love. Children draw.
Independent activity children.
Each child draws a tree and branches by blowing a blot.We were drawing today and we were probably tired
let's do some physical education.
Physical education lesson "The tree is swinging"
The tree is swayingSomewhere in the clouds, (Swinging the body left and right)
The clouds are swaying
In his arms. (We raise our hands up)
These hands are strong
Rush to the heights
Keep the sky blue
Stars and moon.
The wind blows in our facesThe tree swayed. (Swinging the body left and right)
The wind is quieter, quieter, quieter, (Squats)
The tree is getting higher and higher. (Stand on your toes, stretch)
The wind quietly shakes the maple tree,Tilts to the right, to the left: (Swinging the body left and right)
One tilt and two tilt, (Springy tilts)
The maple leaves rustled. (We raise our hands up and wave them)
Analysis of children's works.
Children look at the work.
They give names to their paintings.
They tell us how they painted.
What materials did you use?
What mood do children's drawings evoke?
Guys, we will definitely send our drawings to Lesovich. I hope we helped him.