Drawing for the older group is the theme of a fairy tale. GCD in Fine Arts "My favorite fairy tale" outline of a drawing lesson (senior group) on the topic
Master class on drawing based on the fairy tale “Kolobok”.
Directly educational activities By visual arts for children of senior preschool age.Target: Teach children to draw a plot from a fairy tale
Tasks:
Improve brush technique, convey characteristics subject;
Use elements decorative painting;
Strengthen the ability to arrange images well on a sheet of paper;
Develop aesthetic perception, imagination.
Preliminary work:
Reading and acting out the fairy tale “Kolobok”;
Conversation about the story read;
Examination of pictures, illustrations;
Prepare the work area: secure sheets of paper to the table with tape; Prepare paints and tools.


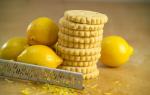
Equipment: Gouache paints, sheets of white or light blue paper in A-4 format, brushes No. 6, No. 2, jars of water, palette, napkins, tape.

Contents of the activity:
The teacher invites the children to guess riddles:
He is scraping the box,
He's dead-on,
He has a ruddy side
He's funny...
(Kolobok)
This red-haired cheat
The bun ate deftly.
(Fox)
Well done! Let's remember the fairy tale "Kolobok", how did it end?
On the edge of the forest
I met a red fox.
- Hello, red fox,
Do you want me to sing, sister?
And the bun began to sing again.
Hello, sweet little bun.
You're singing well, my friend.
Only I'm already old
I became deaf in my ears,
Sit on my tongue
And sing it one more time.
So the bun did.
He got on her tongue
And I was about to sing again.
I didn’t have time to open my mouth,
How he hit the fox in the stomach.
The fox didn't listen to him
And she took it and ate it.

Today we will draw a plot from the fairy tale “Kolobok”. The moment when the fox holds the bun on his nose, and he sings his song. We look at the image and analyze it.
Execution sequence:
Our fox will be bright orange. To do this, we mix orange and red paints on the palette.
Just above the middle of the sheet, draw a circle with a thick brush.

Draw out a triangular nose, starting from the bottom of the muzzle.

We draw a sundress, it is triangular in shape. From the head we extend the lines down to the sides, connect them with a wavy line, and paint them.

Now we draw a fluffy long tail, it curls beautifully.

Front paws.

Hind legs. First, we draw two ovals under the sundress.

Then we stretch the paws up, they resemble a droplet.

While our fox is drying, let's draw a bun. He yellow color and sits on the fox's nose.

Let the bun dry and paint the background with blue gouache. Snowdrifts in the form of a wave, and a thin brush of snowflakes. Then we continue to draw the drawing with brush No. 2.

We use white paint to bring our characters to life. We mark the eyes, decorate the sundress and fur coat of the fox using dots, droplets, wavy and straight lines.

We add black gouache to the characters’ eyes, eyelashes, fox’s nose, and notes.

Draw the bun's nose and mouth.

So our plot from the fairy tale “Kolobok” is ready.

Guys, what do you think, could the fairy tale have had a different ending and the bun could have lived on? Children fantasize... The teacher reads out the continuation of the fairy tale “Kolobok”.

Kolobok. Continuation.
You know it well
Merry bun??
He ran away from all the animals,
But I couldn’t do it from the fox.
He was a braggart and a merry fellow
And he sang songs loudly,
With a cunning red fox
Still managed to cope!
Jumped very high
Grabbed the fox by the tail
And so he ran away,
Not so simple anymore!
He was out of fear for a very long time
Rolled head over heels
But suddenly - the forest ended,
And here is a wonderful house!
Now pies live in it,
Candies, cakes, pretzels,
Cookies, gingerbread, pie
And with them - a brave bun!
All the forest people come to visit them
I started walking on Sunday
And the bun sang songs to them
And he treated me to jam!

Here is a fox in a red fur coat on a white background, and this is a red fox on a light blue background.

Summary of the lesson on fine arts “______” ____________________
Subject:Drawing on the theme “FAVORITE TALE”
Target: learn to convey in drawings your impressions of a fairy tale you read.
Tasks:
introduce with the works of artists V. Vasnetsov, M. Vrubel, Yu. Vasnetsov;
give an idea of the role of fantasy in art;
develop interest in folk fairy-tale creativity, graphic skills in conveying the proportions of complex shaped objects, skills compositional solution drawing;
develop the ability to perform illustrations for fairy tales based on independently chosen plots;
bring up love for folk tales, goodies fairy tales, empathy for the moods of the fairy tale characters, draw children's attention to good deeds and evil;
Equipment: watercolor paints, brushes, palette, water, pencil, napkins, illustrations for Russian folk tales.
Figurative series: reproductions of paintings by V. M. Vasnetsov; M. A. Vrubel, Yu. A. Vasnetsov, children's books with illustrations by Yu. A. Vasnetsov.
Progress of lessons
Student organization. (Psychological mood for the lesson)
The bell rang
Let's start our lesson.
Let's study fine arts
Develop creativity and imagination.
Checking students' readiness for the lesson.
Formulation of the topic, lesson goals.
Look at the board, can you think of what all these illustrations have in common?
What is the topic of our lesson?
Do you often read fairy tales?
Why do you think fairy tales were invented?
Name your favorite fairy tales.
There are many sad and funny fairy tales in the world.
And we cannot live in the world without them.
Let the heroes of fairy tales give us warmth,
May good triumph over evil forever.
You all love looking at pictures in books.
What do you call an artist who draws pictures for books? ( illustrator .)
So you will try yourself in this capacity and illustrate your favorite fairy tale. But first, let's see how the artists coped with this task. All of them were very fond of fairy tales as children, especially Russian folk tales.
Who knows why they are called that? Who composed them? (People)
3. Work on the topic of the lesson.
(Teacher's story about artists illustrating fairy tales. Demonstration of drawings by Yu. Vasnetsov, V. Vasnetsov analysis of them.)
Brief story about famous Soviet illustrators of children's books and display of books with their illustrations for Russian folk tales
Familiarization with the works of artists Yu. Vasnetsov, V. Vasnetsov.
Yuri Alekseevich Vasnetsov
One of these artists is Yuri Vasnetsov. For Vasnetsov, the world of a fairy tale is a world of happiness, where there is neither cruelty nor envy and where good always triumphs over evil. Therefore, all his heroes - a brave rooster, a timid hare, a funny little goat, a clumsy and good-natured bear, a cheerful cat, even a fierce wolf and a tricky fox - evoke the sympathy of the audience. Following the artist, we enter a fairy-tale land of goodness and beauty.
Viktor Mikhailovich Vasnetsov
One of the most favorite themes for artists is fairy tales. And among the storytellers, one cannot help but mention the wonderful Russian artist Viktor Vasnetsov. Almost all Russian heroes came to life for us on his canvases folk tales. The paintings by V. Vasnetsov “Alyonushka” and “Ivan Tsarevich on Gray Wolf", "Three heroes".
4. Updating students' knowledge.
1) - We looked at the works of several artists and were convinced that each of them depicts the fairy-tale world in their own way.
M. Vrubel and V. Vasnetsov in their paintings show heroes when they are sad and anxious. This is evidenced by the colors they used when painting. A. Yu. Vasnetsov, as already noted, in his drawings creates a feeling of celebration, using bright colors.
So, before starting work, you should think about what episode from a fairy tale you would like to draw, what they are experiencing this moment characters, what mood they are in.
If they are sad or in danger, what colors will you use to convey their state?
That's right, dark, muted tones that create a feeling of anxiety. If it is a forest, then it is dark green; if it is a river, then the water in it is dark.
And if the heroes have already defeated evil, what paint will help us convey a feeling of joy? Indeed, bright colors will help us convey the mood of the characters. The day will be sunny and bright, the sky will be blue, the forest and grass will be bright green.
Having decided what you will draw, you need to carefully consider the composition of the drawing so that the drawing looks like a single whole.
5. Stages of drawing
1. Composition of the drawing.
Children’s thinking through drawing layouts and their compositional solutions.
Which hero or heroine do you like the most and why? (Students' answers.)
Which part of the fairy tale would you like to illustrate?
At this time, the teacher again demonstrates the illustrations and, if necessary, makes sketches on the board (how the path goes into the distance, how the sky separates from the earth, how to draw animals, trees, etc.) Children can depict the main characters of the fairy tale in their own way.
Since animals are the heroes of a fairy tale, they can talk and be dressed like people.
1) Determine the location of the main characters in the picture.
Drawing a fairy tale begins with defining with a pencil the composition of the plot, the location of the main characters of the fairy tale on a sheet of paper. Then the whole plot is drawn out in detail.
2) Then, using thin pencil lines, draw the horizon line and mark the places where the remaining objects will be located.
Children, if possible, independently choose the plot to illustrate. It is necessary to ensure that students take the most expressive plots. Students draw an illustration verbally, as it were, starting their story by choosing a sheet format. Several students tell the whole class in detail what and how they will draw.
Think over the image of your plot.
2. Carrying out a pencil sketch.
Using thin pencil lines we draw the details of all objects, measuring their proportions. All objects that are in the distance should be smaller than those that are in the foreground. Animals and people should not be taller than trees.
6. Practical work.
1. Assignment: complete the drawing-illustration “My Favorite Fairy Tale” in pencil.
At the end of the work, the teacher checks the correctness of execution pencil drawing and helps correct shortcomings.
(If the guys have time, they can start working in color.
Tint the general background for the sky, earth, forest.)
2. Working with color.
1) The choice of color scheme depends on what emotional state or mood you want to convey in the drawing.
We start filling the picture with color by painting the sky, then paint the ground and then paint the rest of the objects. Make sure that there are no voids (white spots) between the sky and the ground.
2) Drawing the details of the picture.
Using a thin brush, we will draw small details: thin tree branches, characters’ faces, etc.
It should be remembered that many artists use such things to convey the fabulousness of what is happening, to highlight the main characters. visual arts , How
light on dark, dark on light,
contrast of big and small,
bright color against a calm background.
Use these tools too.
And remember - everything you learned from them visual arts(the ability to work with a pencil, paint, brush, select beautiful color combinations, convey the shape and design of various objects, knowledge of the rules of composition, cold and warm colors), can and should be used in your illustrations.
Assignment: complete a drawing-illustration of “My Favorite Fairy Tale” in color.
Select a story
Decide whether to place the sheet vertically or horizontally
Outline the main elements of the drawing without pressing hard on the pencil
Check the balance of the composition and start working with color, emphasizing dark on light, and light on dark
7. Summary of lessons. Reflection.
1. Exhibition of student works.
2. Final word teachers.
A real fairyland has appeared in our class. Looking at your drawings, I just want to quote A. S. Pushkin’s poem.
Current page: 6 (book has 12 pages total) [available reading passage: 8 pages]
Lesson 32. Modeling “Make your favorite toy”
Program content. Teach children to create an image of their favorite toy in modeling. Practice various sculpting techniques with your palms and fingers. Cultivate the desire to finish what you start. Form an aesthetic attitude towards your works, learn to evaluate them.
Methodology of conducting the lesson. Ask the children which of them likes which toys. Discuss the most interesting and accessible toys for depiction, decide what modeling methods can be used. Encourage interesting ideas and ensure that correct, varied ways of creating images are used.
At the end of the lesson, admire all the works, choose the most interesting ones, and draw the children’s attention to their beauty and expressiveness.
Materials.
Children playing with toys.
Lesson 33. Drawing “My Favorite Fairy Tale”
Program content. Teach children to convey episodes from their favorite fairy tale in drawings (draw several fairy tale characters in a certain setting). Develop imagination and creativity. To form an aesthetic assessment, an aesthetic attitude towards the created image of a fairy tale.
Methodology of conducting the lesson. The day before, talk to your children about their favorite fairy tales. Remember what they say, what the characters look like, what they do. Offer to look at illustrations in books. During the lesson, remind the children what desires they expressed, and think together about how the idea can be realized: first, draw the main character with a simple pencil.
While working, draw children's attention to the expressive rendering of fairy tale characters, their location on a piece of paper, and the color in the drawings. Remind about the correct techniques for painting with watercolors, about the location of images on the sheet.
At the end of the work, display all the finished drawings on the board or lay them out on the table, examine them, invite the children to choose the drawings they like best and explain their choice.
Materials. Landscape sheets, a simple graphite pencil, watercolor paints, brushes, a palette, a jar of water, a napkin (for each child).
Connections with other activities and activities. Reading and telling fairy tales, looking at illustrations. Watching filmstrips and TV shows. Organization of dramatization games.
"Kolobok"
Roma A., senior group
Lesson 34. Drawing “Truck”
Program content. Teach children to depict objects consisting of several rectangular and round parts. Learn to correctly convey the shape of each part, its characteristic features (the cabin and engine are rectangular in shape with a cut corner), and correctly position the parts when depicting them. Strengthen the skill of drawing vertical and horizontal lines, correct painting of objects (without gaps, in one direction, without going beyond the contour lines).
Methodology of conducting the lesson. Show the children a toy car. Say that today they will draw the same one. Offer to look at it carefully. It’s better to start looking at the largest part – the body.
Ask the children what shape the body is and trace its outline with your finger. Then ask what shape the cabin is. If the children answer “rectangular”, say: “Yes, almost rectangular”; If they find it difficult to answer, ask a leading question: “Which form is it most similar to?” Ask how the shape of the cabin differs from the rectangular shape (one corner is cut off and the side is slanted). Ask the children which part is the largest, how all the parts of the machine are located.
Pay attention to the wheels, their shape and location in relation to other parts of the car (one is almost in the middle, under the car body, the other is under the engine). As a rule, children do not pay attention to this and shift the location of the wheels in the drawing (as it happens).
Specify the sequence of work. (It’s more convenient to start with the largest part - the body and then draw the next ones sequentially, comparing them by size.)
Remind the children that they should not draw the body very close to the bottom edge of the sheet, otherwise the wheels won’t fit and the drawing will be ugly.
Ensure that children use the drawing methods shown; They correctly conveyed the shape of the parts, their size, location, and beautifully painted over the drawings.
At the end of the work, review all the drawings and choose the best ones.
Materials. Landscape sheets, colored pencils (for each child).
Connections with other activities and activities. Examine different trucks (toys, illustrations) with children, compare them, and invite them to note similarities and differences.
Lesson 35. Application “Cars are driving down the street” (Collective work)
Program content. Teach children to convey the shape and relative positions of parts of different machines. Strengthen various cutting techniques in a straight line, in a circle; neat gluing techniques. Strengthen the ability to create collective composition. Develop creative thinking, imagination. Develop the ability to evaluate created images.
Methodology of conducting the lesson. This lesson is a continuation of the collective work “Houses on our street” (lesson 28). Hang what the guys made earlier teamwork, ask what else is missing on the street. Suggest cutting and pasting cars driving down the street. Find out how to cut cars. Each child glues the image together, then, together with the teacher, finds its place in the overall composition.
Everyone look at the picture together, think about what else can be added to it (grass, trees, sun, etc.). Hang the composition in the group.
Materials. A set of colored paper, scissors, glue, glue brush, napkin (for each child).
Connections with other activities and activities. Observations on the streets, looking at illustrations. Making the applique “Houses on our street.”
Lesson 36. Drawing “Painting an oleka”
Program content. Teach children to paint three-dimensional products based on folk decorative patterns. Learn to identify the main elements of the pattern and their location. Develop aesthetic perception. Reinforce painting techniques with paints. Continue to develop the ability to review your work and evaluate it.
Methodology of conducting the lesson. Explore Dymkovo products with your children. Ask what elements decorate the figures, what color they are, and how they are located. Invite the children to paint the figurines of deer they sculpted earlier (see lesson 30). (When the previously sculpted figures have dried, the children, together with the teacher, cover them with whitewash (gouache) in their free time.)
While working, draw children's attention to color combinations.
At the end of the lesson, look at all the figures.
Materials. Samples folk toys. Previously sculpted figures. Gouache paints, palettes, brushes, a jar of water, a napkin (for each child).
Connections with other activities and activities. Examination of Dymkovo clay figurines and their painting; highlighting shape, color, pattern elements, their arrangement in shape.
Lesson 37. Drawing according to plan
Program content. To develop children’s ability to conceive the content of their drawing and bring the idea to completion. Continue learning to paint with watercolors. Develop creativity and imaginative ideas. Continue to develop the ability to examine your work, highlight images that are interesting in design, and evaluate your work.
Methodology of conducting the lesson. Invite the children to think about what interesting things they know, saw, or were told about. While listening, emphasize what would be good to draw. Invite the children to draw a picture about something interesting. In the process of drawing, help children who will have difficulty clarifying the sequence of the image, the location of objects on a sheet of paper, etc. Ensure that proper watercolor painting techniques are used.
At the end of the work, look at all the drawings, choose the most interesting ones together with the children, and invite their authors to talk about what they drew.
Materials. White paper of various sizes to choose from, watercolors, palettes, brushes, a jar of water, a napkin (for each child).
Connections with other activities and activities. Music classes, reading books, leisure evenings, children's games, etc.
Lesson 38. Drawing “Winter”
Program content. Teach children to convey in a drawing a picture of winter in a field, in a forest, in a village. Strengthen your drawing skills different houses and trees. Learn to draw by combining in a drawing different materials: colored wax crayons, sanguine and white (gouache). Develop imaginative perception, imaginative ideas, creativity.
Methodology of conducting the lesson. Recall with the children what they saw during the walk (houses, trees, snow). Offer to read a poem about winter. Specify the shape and location of houses; their parts. Together with the children, outline the sequence of the drawing. Remind the methods of drawing with colored wax crayons. Invite the children to think and draw what is located near the houses (trees, bushes, cars, etc.). When the work with colored crayons is completed, offer to draw snow with gouache.
At the end of the lesson, when examining ready-made drawings draw children's attention to how beautifully colored wax crayons and whitewash are combined in a drawing; for the successful placement of images on the sheet.
Materials. Light-colored paper (gray, blue, yellow) A4 size, colored wax crayons, whitewash (gouache), brushes, a jar of water, a napkin (for each child).
Connections with other activities and activities. Observations on a walk. Examination of illustrations, reproductions of paintings. Learning poems about winter, reading fiction. Singing songs about winter in music classes.

"Winter"
Olya R., senior group
Lesson 39. Modeling “Kitten”
Program content. Teach children to create the image of an animal in modeling. Strengthen the ability to sculpt an animal figurine in parts, using different techniques: rolling clay between the palms, pulling small parts, joining parts by pressing and smoothing the joints. Learn to convey the pose of a kitten in sculpting.
Methodology of conducting the lesson. Consider a toy kitten with your children. Clarify the shape, size and location of parts, sculpting techniques. Teach children to achieve expressiveness of the figure using familiar techniques of pulling and smoothing.
At the end of the work, examine all the sculpted figures and note the most expressive ones.
Materials. Toy kitten. Clay, modeling board, stack (for each child).
Connections with other activities and activities. Looking at ceramic and stuffed toy cats. Getting to know domestic animals, their characteristics and habits. Reading books. Looking at illustrations.
Lesson 40. Drawing “Big and small spruce trees”
Program content. Teach children to place images on a wide strip (location of close and distant trees lower and higher on the sheet). Learn to convey the difference in height of old and young trees, their color and characteristic structure (old spruce trees are darker, young ones are lighter). Develop aesthetic feelings and imaginative ideas.
Ate at the edge of the forest -
To the top of your head.
They listen, they are silent,
They look at their grandchildren.
And the grandchildren are Christmas trees,
thin needles,
At the forest gate
They lead a round dance.
Remember what trees the children looked at during the walk (high and low). Call the child to the board to determine where which trees should be drawn. Discuss with children possible options compositions. In the process of drawing, remind them of the text of the poem; pay attention to the color of young and old trees, their location and height. Remind you to paint small branches and details with the end of the brush.
At the end of the lesson, look at all the drawings, choose those where poetic image The forest turned out to be especially expressive.
Materials. Gray or blue paper, gouache and watercolor paints, brushes, palette, jar of water, napkin (for each child).
Connections with other activities and activities. Observations of nature. Learning poems, looking at illustrations.
Lesson 41. Drawing “Blue and red birds”
Program content. Teach children to convey a poetic image in a drawing, select the appropriate color scheme, beautifully arrange the birds on a sheet of paper. Strengthen the ability to paint with watercolors, use brushes and paints correctly. Develop figurative, aesthetic perception, imaginative ideas.
- Bird,
Red bird,
Why are you red?
– I pecked at the red berries.- Bird,
White bird,
Why are you white?
– I pecked white berries.- Bird,
Blue bird,
Why are you blue?
- I pecked blue berries.
Bring to the consciousness of children the image contained in the poem. Practice them in drawing the outlines of birds in different poses paints on a separate sheet. Then offer to come up with a composition and execute it on a large sheet of paper. Remind that in one drawing the birds should be the same color as the berries they peck.
Materials. Gray or other light-colored paper, gouache or watercolor paints, brushes, palette, jar of water, napkin (for each child).
Connections with other activities and activities. Observations on a walk. Reading books, learning poems. Creation collective application"Birds on the branches."
Program content. Teach children to paint a template based on Gorodets painting. Learn to highlight decorative elements paintings, their compositional arrangement, color. Develop a sense of rhythm, color, composition.
Methodology of conducting the lesson. Show children Gorodets painting on wood products. Examine them, reinforcing the ability to highlight the features of this painting. Note which elements make up the pattern, how they are arranged, and how the color is used. Clarify by asking the children the sequence of work.
At the end of the lesson, look at all the pictures. Choose the most successful works.
Materials. Products made by children, Ukrainian ceramics. Gouache.
Connections with other activities and activities. Examination of painted ceramic dishes. Modeling a dish.
Lesson 43. Application “Large and small glasses”
Program content. Teach children to cut out symmetrical objects from paper folded in half, cutting off a strip that widens downward. Strengthen the ability to carefully stick. Create a desire to complement the composition with appropriate objects and details.
Methodology of conducting the lesson. Consider with your children a glass that expands at the top. Show that it is the same on both sides (you can put a pencil in the middle and show it to each row separately) (if the children are sitting at double tables standing in 2-3 rows behind each other). Explain that objects that are the same on both sides can be cut out of paper folded in half. Covering half of the glass (on the left or right) with a piece of paper, outline the second half, visible to everyone.
Show the children the cutting technique. Explain that you need to hold a piece of paper by the folded middle and cut out only half of the object. Give the children the opportunity to practice first on plain thin paper, and then offer to cut out a glass from colored paper. Render individual assistance: showing, reminding, encouraging. If the children successfully complete the task, invite them to think about what might be in the glass.
Materials. A glass. Exercise paper, paper rectangles different colors for cutting out glasses, scissors.

“How we walk in kindergarten”
Natasha V., senior group
Lesson 44. Drawing according to plan
Program content. Teach children to independently outline the content of the drawing, choose the size and color of paper, paint, pencils or other materials. Develop the ability to highlight interesting drawings, explain your choice.
Methodology of conducting the lesson. Tell the children that today they will draw whatever they want. Offer to select the necessary materials. Use questions and advice to help children determine what, how and where will be drawn. For children who find it difficult to choose a topic, remind them of what surrounds them, what interesting things they saw, what they were read about, what they were told about. During the drawing process, encourage interesting ideas and complement images with characteristic details.
Enjoy the variety of designs.
Materials. Paper different sizes and flowers, watercolors, colored pencils, colored wax crayons.
Connections with other activities and activities. Walks and excursions. Reading books, learning poems, singing songs, children playing.
Lesson 45. Modeling “Girl in a winter coat”
Program content. Teach children to sculpt a human figure, correctly conveying the shape of clothing and body parts; keeping the proportions. Strengthen the ability to use previously learned techniques for connecting parts and smoothing out fastening points. Continue to develop the ability to evaluate created images.
Methodology of conducting the lesson. Examine with your children the figure of a girl (toy) in winter clothes. Clarify the shape of the parts, sequence and sculpting techniques. During the work, remind about the correct connection of parts. Direct children's attention to more accurately convey the shape of parts, their location, and proportions.
Materials. Clay (plasticine), modeling board, stack (for each child).
Connections with other activities and activities. Observations on walks. Looking at children in winter clothes and dolls.
Lesson 46. Drawing “Snowflake”
Program content. Teach children to draw a pattern on paper in the shape of a rosette; arrange the pattern in accordance with the given shape; come up with the details of the pattern as you wish. Strengthen the ability to draw with the end of a brush. Foster independence. Develop figurative ideas and imagination. Inspire the joy of creating a subtle, graceful design.
Methodology of conducting the lesson. Show children 2-3 samples of snowflakes, examine them, and clarify the construction of the pattern. Say that each child should draw the base (rays), and then decorate them as desired. Clarify the technique of drawing thin lines with the end of a brush by asking the children about it. Remove the samples and invite the children to start drawing.
At the end of the lesson, review all the works and, together with the children, choose the most symmetrical and subtle patterns.
Materials. Samples of snowflakes (2–3 pieces). White gouache, dark paper in the shape of a rosette, brushes, a jar of water, a napkin (for each child).
Connections with other activities and activities. Looking at lace, looking at snowflakes while walking, patterns on windows.

"Snowflake"
Katya Sh., senior group
Lesson 47. Application “New Year’s greeting card”
Program content. Teach children to make greeting cards by selecting and creating an image appropriate to the holiday. Continue learning to cut out identical pieces from paper folded like an accordion, and symmetrical pieces from paper folded in half. Reinforce cutting and pasting techniques. Develop aesthetic perception, figurative ideas, imagination.
Methodology of conducting the lesson. Invite children to think about how they can decorate greeting card for the New Year. Praise for interesting answers. Show 3-4 New Year cards with simple images.
Invite the children to make their own greeting card. When approaching children during the drawing process, ask what the child is going to draw on the postcard; If necessary, help with advice and reminders.
At the end of the lesson, review all the postcards, invite each child to choose the postcard he would like to receive; explain your choice.
Materials. 3–4 New Year cards. Half album sheet, folded in half - a postcard, white or any soft tone (to choose from), sets of colored paper.
Connections with other activities and activities. Preparing for New Year's holiday. Christmas tree decoration. Looking at Christmas tree decorations. Organization of the exhibition New Year cards with plots accessible to children for depiction (the teacher should not direct children to directly copy these postcards).
Lesson 48. Drawing “Our decorated Christmas tree”
Program content. Teach children to convey impressions of the New Year holiday in a drawing, to create the image of a decorated Christmas tree. Learn to mix paints on a palette to obtain different shades of colors. Develop imaginative perception, aesthetic feelings (rhythm, color), imaginative ideas.
Methodology of conducting the lesson. Clarify with the children the structure of the Christmas tree, methods of transferring fluffy branches, and possible decorations.
At the end of the lesson, look at all the drawings and offer to choose the most elegant Christmas trees; note the varied arrangement of toys and the beautiful combination of colors.
Materials. Landscape sheets, watercolor paints, brushes, palette, jar of water, napkin (for each child).
Connections with other activities and activities. Preparation for the New Year's holiday in kindergarten and participation in the matinee, viewing television programs. Looking at New Year's cards.

“What I liked about the Christmas tree”
Natasha V., senior group
Municipal autonomous institution additional education children center aesthetic education children "Creativity"
on the topic: “ILLUSTRATING “MY FAVORITE FAIRY TALE”
Compiled by:
additional education teacher
Kelekhsaeva E.Yu.
Topic: “ILLUSTRATING “MY FAVORITE FAIRY TALE”
Illustration of the Russian folk tale "Kolobok"
(arranged by K. Ushinsky)
Purpose of the lesson:
Introducewith the works of artists V. Vasnetsov, M. Vrubel,
Yu. Vasnetsova; give an idea of the role of fantasy in art;
Tasks:
Educational:
develop the ability to perform illustrations for folk tales on independently chosen subjects;
Educational:
developinterest in folk fairy tales, graphic skills in conveying the proportions of objects with complex shapes, skills in compositional design;
Educators:
bring uplove for Russian folk tales, for the positive heroes of fairy tales, empathy for the moods of fairy tale heroes, to draw children's attention to good and evil deeds.
Type of lesson: combined
Equipment : watercolor paints, brushes, palette, water, pencil, napkins, illustrations for Russian folk tales.
Figurative series: reproductions of paintings by V. M. Vasnetsov; M. A. Vrubel, Yu. A. Vasnetsov, children's books with illustrations by Yu. A. Vasnetsov.
Progress of the lesson
1. Organization of students.
Checking students' readiness for class.
II . Report the topic of the lesson.
Guys, what books do you like to read most? Of course, fairy tales.
Name the fairy tales from which you will hear excerpts.
1) The crane taps and taps its nose on the plate. I knocked and knocked, but nothing hit.
("The Fox and the Crane")
2) Granddaughter for grandmother, grandmother for grandfather, grandfather for turnip. They pull, they pull, but they cannot pull.("Turnip")
3) - Who, who lives in the little house?
Who, who lives in a low place?
I, little mouse.
I, frog-frog, and who are you? (“Teremok”)
4) - Don’t sit on the tree stump, don’t eat the pie. Bring it to grandma, bring it to grandpa.
("Masha and the Bear")
5) And the fox sits and says:
The beaten one carries the unbeaten, the beaten one carries the unbeaten... (“The Wolf and the Fox”)
6) Ivan Tsarevich entered a swamp. He looks and sees a frog frog sitting and holding his arrow.("Princess Frog")
7) The kids opened the door, the wolf ran into the hut and ate all the kids.("The wolf and the seven Young goats").
8) – I am from grandma left,
And he left his grandfather.
And from you, hare,
And I'll be leaving sooner rather than later.(“Kolobok”)
You all love looking at pictures in books.
An artist who draws pictures for books is calledillustrator .
So you will try yourself in this capacity and illustrate your favorite fairy tale. But first, let's see how the artists coped with this task. All of them were very fond of fairy tales as children, especially Russian folk tales.
Who knows why they are called that? Who composed them? (People)
What other fairy tales are there? (Copyright).
III . Work on the topic of the lesson.
1. Features of the fairy tale genre.
(Teacher's story about artists illustrating fairy tales. Demonstration of drawings by Yu. Vasnetsov, V. Vasnetsov and I. Bilibin, E. Rachev, analysis of them.)
A short story about famous Soviet illustrators of children's books and a display of books with their illustrations for Russian folk tales.
Visiting a fairy tale
Fairy tale - This special world fantasy and reality. Rooted in ancient times, the fairy tale in figurative form depicts the way of life of the people, reveals their hidden feelings, dreams and aspirations.
Russian folk tale has a common basis with Russian visual folklore. That's why many fairy tale illustrators turn to popular popular print, to Vyatka clay toy, to ancient gingerbread boards, to the motifs of Russian national ornaments.
2. Familiarization with the work of artists Yu. Vasnetsov, V. Vasnetsov.
In previous classes we learned that artists depict everything real that they see in life.
Do artists depict something that does not exist, that is created by the human imagination? That's right, when artists draw fairy-tale characters, they depict something that does not exist in life.
Yuri Alekseevich Vasnetsov.
One of these artists is Yuri Vasnetsov. For Vasnetsov, the world of a fairy tale is a world of happiness, where there is neither cruelty nor envy and where good always triumphs over evil. Therefore, all his heroes - a brave rooster, a timid hare, a funny little goat, a clumsy and good-natured bear, a cheerful cat, even a fierce wolf and a tricky fox - evoke the sympathy of the audience. Following the artist, we enter a fairyland of goodness and beauty. All illustrations by Yuri Vasnetsov are distinguished by the coloristic harmony of color and tonal relationships, and the artist’s extraordinary decorative gift.
Admire Yu. Vasnetsov’s illustrations for fairy tales and try to understand how the artist, with the help of drawing, color, tonal relationships and composition, masterfully conveys the very spirit of Russian folk tales, images of fairy-tale heroes and characters.
Viktor Mikhailovich Vasnetsov (1848-1926)
One of the most favorite themes for artists is fairy tales. And among the storytellers, one cannot help but mention the wonderful Russian artist Viktor Vasnetsov. Almost all the heroes of Russian folk tales came to life for us on his canvases. V. Vasnetsov’s paintings “Alyonushka” and “Ivan Tsarevich on the Gray Wolf”, “Three Heroes” are widely known.
In the painting “Alyonushka” we feel how touching tenderness and the deep poetry of the Russian fairy tale excited the sensitive heart of the artist. The girl’s frozen pose, bowed head, sadness-filled gaze - everything speaks of Alyonushka’s melancholy and grief. The surrounding nature is in tune with her mood, it seems to be mourning along with her: the branches of thin aspens bent sympathetically over the girl, the leaves of reeds and sedges drooped... In the painting “Alyonushka” the poetry of folk tales is fused with the poetry and sincerity of Russian nature. There are many fairy tales about the hero - a Russian knight who stands up for the offended and fights evil so that good can win. In the painting “The Knight at the Crossroads” the artist depicted a Russian hero in full military equipment - with a shield, a pike, a bow and arrows, a helmet and chain mail, on a handsome white horse. Reading the inscription on the stone, the knight thinks about where to direct his path, and the soft pink sunset fills everything around with a mysterious light. And we seem to find ourselves in a fairy tale, and we also have to make a choice... Masterfully mastering the art of composition, drawing and painting techniques, the artist with great warmth creates images of our national fairy-tale heroes.
IV . Updating students' knowledge.
1) - We looked at the works of several artists and were convinced that each of them depicts fairy world.
M . Vrubel and V. Vasnetsov in their paintings show heroes when they are sad and anxious. This is evidenced by the colors they used when painting. A. Yu. Vasnetsov, as already noted, in his drawings creates a feeling of celebration using bright colors.
So, before starting work, you should think about what episode from the fairy tale you would like to draw, what the characters are experiencing at the moment, what their mood is.
If they are sad or in danger, what colors will you use to convey their state?
That's right, dark, muted tones that create a feeling of anxiety. If it is a forest, then it is dark green; if it is a river, then the water in it is dark.
And if the heroes have already defeated evil, what paint will help us convey a feeling of joy? Indeed, bright colors will help us convey the mood of the characters. The day will be sunny and bright, the sky will be blue, the forest and grass will be bright green.
Having decided what you will draw, you need to carefully consider the composition of the drawing so that the drawing looks like a single whole.
2) Conversation about the heroes of the fairy tale “Kolobok”.
(The children, together with the teacher, recall the content of the fairy tale.)
Let's remember the main characters of the fairy tale.
Who met the kolobok first? What song did Kolobok sing to him?
Who did you meet second? Third? The last one?
(Illustrations of animals are attached to the board).
What riddles do you know about them? How do they characterize these animals?
V . Stages of drawing.
1. Composition of the drawing.
Children’s thinking through drawing layouts and their compositional solutions.
Which hero or heroine do you like the most and why?(Students’ answers.)
Which part of the fairy tale would you like to illustrate?
At this time, the teacher again demonstrates the illustrations and, if necessary, makes sketches on the board (how the path goes into the distance, how the sky separates from the earth, how to draw animals, trees, etc.) Children can depict the main characters of the fairy tale in their own way.Since animals are the heroes of a fairy tale, they can talk and be dressed like people.
1) Determine the location of the main characters in the picture.
Drawing a fairy tale begins with defining with a pencil the composition of the plot, the location of the main characters of the fairy tale on a sheet of paper. Then the whole plot is drawn out in detail.
2) Then, using thin pencil lines, draw the horizon line and mark the places where the remaining objects will be located.
Think over the image of your plot.
2. Carrying out a pencil sketch.
Using thin pencil lines we draw the details of all objects, measuring their proportions. All objects that are in the distance should be smaller than those that are in the foreground. Animals and people should not be taller than trees.
VI . Practical work.
1. Assignment: complete the drawing-illustration “My Favorite Fairy Tale” in pencil.
2. Working with color.
3. Drawing the details of the picture.
Select a story.
Decide whether to place the sheet vertically or horizontally
Outline the main elements of the drawing without pressing hard on the pencil
Check the balance of the composition and start working with color, emphasizing dark on light, and light on dark
VII . Summary of the lesson. Reflection.
1. Exhibition of student works.
2. Final word from the teacher.
A real fairyland has appeared in our studio.
How well you were able to convey in your drawings your love for the heroes of fairy tales and their mood. Well done!
3. Reflection.
If you liked the lesson, then draw a smile on the bun, if not, then a sad face.
Irina Golynova
Summary of an integrated lesson in the senior group on the topic:« Fairy tales travel around the world. Drawing fairy tale characters(by design).
(artistically - aesthetic development, speech development, social and communicative development)
Program content: to form and expand children’s ideas about the world fairy tales with the help of visual arts. Teach children to depict episodes from their favorite fairy tales(draw several fairy tale characters in a certain environment). Develop imagination and creativity.
Develop skills in working with wax crayons, creating a drawing according to your own ideas. Learn to recognize fairy tale according to assignment.
Techniques: conversation, demonstration, examination, guessing riddles, surprise moment, independent activity children, playing.
Methods: verbal, visual, gaming, ICT
Materials: wax crayons, white sheet of A4 paper, Pinocchio toy, quiz on the computer « Fairy tales travel around the world» , audio recording with melodies, laptop, TV.
Progress of the lesson:
Children come into group and stand in a circle.
Educator: Fairy tale is knocking on our door
Let's say fairy tale: "Come in"
IN in a fairy tale anything can happen
What will happen next?
A fairy tale goes around the world,
Leads us all by the hand
A fairy tale - clever and charming -
He lives next to us.
Guys, where do you think I want to invite you to travel?
Children: IN fairy tale!
Educator: Right! I invite you to go to one amazing country, - country fairy tales. Do you love fairy tales?
Children: Yes!
Educator: Well, then let's go! Close your eyes and I will say magic words words: "One, and two, and five, and eight, in we carry everyone's fairy tale!
Open your eyes. Here we are with you in magical land fairy tales.
(sit in front of the TV screen)
Guys, look, a resident has come to us fairyland . What's his name?
Children: Pinocchio!
Educator: Right! Which one is he from? fairy tales?
Children: Golden Key.
Educator: Guys, Pinocchio loves to play and he wants to play with you too. He wants to know how well you know fairy tales and fairy-tale heroes. Shall we play with Pinocchio?
Children: Yes!
Educator: Then listen to the first task that I have prepared for you Pinocchio:
"Guess the hero fairy tales»
I'm walking on my feet, in red boots,
I carry the scythe on my shoulders.
The fox has left the stove. (Cockerel) (slide 1)
Right! And from which fairy tales?
The grandmother loved her granddaughter very much,
Grandma gave her a hat.
The girl forgot her name.
Who can guess what her name was? (Little Red Riding Hood) (slide 2)
Well done! Which one is she from? fairy tales?
It was baked from flour,
It was freezing at the window.
Ran away from my grandparents
And he became lunch for the fox. (Kolobok) (slide 3)
Right! Which one is he from? fairy tales?
Waiting for mother with milk
And they let the wolf into the house.
Who were these
Small children? (Kids) (slide 4)
Well done! Which one are they from? fairy tales?
Gobbling up rolls,
A guy was riding on a stove.
Rode around the village
And he married the princess. (Emelya) (slide 5)
Right! Which one is he from? fairy tales?
Educator: Well done boys! Buratino says that you completed his task. Let's move on to the next one that has been prepared for us Pinocchio:
“What’s extra?”
The teacher shows slides with images characters, which occur in the intended fairy tale, one there will be an extra character, which is not related to the content fairy tales.
1 Fox, hare, hut, palace, dog, rooster. (What's extra)
That's right, a palace. From what fairy tale heroes? (zayushka's hut)
2 grandfather, grandmother, granddaughter, cucumber, turnip. (What's extra)
That's right, cucumber. From what fairy tale heroes? (Turnip)
3 Mashenka, ducks, Vanyusha, Baba Yaga, Geese-swans. (What's extra)
That's right, ducks. From what fairy tale heroes? (Swan geese)
Educator: Well done boys! Pinocchio is very pleased with you.
And now he wants you and me to play a little.
Physical education minute "Gnome"
Gnome in the forest walked, (walking in place)
I lost my cap. (bending forward - "We're looking for something missing")
The cap was not simple
With a golden bell. (claps hands)
Who can tell the gnome more precisely? (jumping in place)
Where should he look for what he lost? (walking in place)
Educator: Guys, I want to invite you to be a little artists and draw your favorite fairy tale characters. And then together with you we will create our own magazine which will be called "Our favorite fairy-tale heroes » . I've already prepared the cover, take a look.
Take your jobs. Before we get to work, we need to prepare our fingers, for this we will make a finger gymnastics:
We will call fairy tales:
Mitten, tower,
Kolobok - ruddy side,
There is a Snow Maiden - beauty,
Three bears, wolf-fox,
Let's not forget Sivka-burka,
Our prophetic kaurka.
About the firebird we know the fairy tale,
We don’t forget the turnip,
We know the wolf and the kids
This everyone is happy about fairy tales.
(clapping for the last line)
Remind children what their desires are expressed together with everyone, think about how this can be done draw. Remind about the right techniques drawing with wax crayons. A wax crayon is a short colored stick; you should hold it slightly below the middle, without squeezing it too hard. The chalk gives a wide textured line. At first outline is drawn, and then paint over the drawing.
A small object - short strokes, a large object - long strokes. To obtain different shade you need to use different pressure on the chalk to shade the color. Paint evenly, in one direction without gaps. To get a good shading, learn to regulate hand speed (the middle is faster, the strokes are long, and the edges are short and slow) and do the shading carefully.
During the work, pay attention to expressive transmission fairy tale characters, on their location on a sheet of paper.
Educator: Guys, Pinocchio really liked our magazine.
It's time for us to return to kindergarten. Close your eyes and I will say magic words words: one, and two, and five, and eight – we transfer everyone to kindergarten.”
This is our class ends. Well done!