Animals with black pen. Gel pen graphics: tips for beginners
Used every day by office workers, school and university students, it is also an excellent drawing tool. Gel pen graphics have a great advantage: the drawing is clear and rich. Although, on the other hand, it will not be possible to erase incorrectly drawn strokes with an eraser. Since the prices for pens are low, drawing with them is quite profitable and economical. Decorative graphics made with gel pens can become an original and interesting addition to your home interior.
Where to begin?
For inexperienced artists who are just looking for their skills in drawing, black gel pens are perfect. They will help make the drawing refined and sophisticated. Graphics with a gel pen for beginning artists will not be difficult to perform, you just need to take into account some features.
Pressure
There are different ways to press pens onto a piece of paper. To get a continuous thin line, you need to use direct pressure. The pen is placed perpendicular to the paper and a straight line is drawn. This method is perfect for drawing contours. You can draw by pressing the tool at an angle. The result is dull strokes. If you draw lines in one direction in this way, you can create halftone transitions. Intersecting lines will help deepen and enhance shadow areas.
Paper and its structure
When using a drawing method such as graphics with a gel pen, you must also take into account the structure of the paper. If you choose smooth paper, the lines will be clear and even. If you draw on a rough surface, the lines will turn out short and choppy.

Circuit
In order to avoid making irreparable mistakes in your work, you first need to draw an outline using a regular graphite pencil. Then minor mistakes can be removed with an eraser. This procedure must be done after tracing all the details with a pen. In this case, you need to wait until the drawing dries completely. The lines drawn with a gel pen are generally of the same thickness. It depends on the diameter of the rod. To draw lines of different thicknesses, you need to choose pens with different ball diameters. When drawing, it is better to use several gel pens, since different dyes have different densities. As a result, you can get lines of varying saturation, which will create a unique effect.
Patterns
You can draw anything using a technique such as gel pen graphics. The patterns, for example, turn out simply fantastic. When drawing patterns, you can allow yourself to realize almost any fantasy on paper. To make the drawing original and unusual, you need to use more than one gel pen. If desired, you can add colors to the pattern and take multi-colored gel pens. If the artist’s imagination does not allow him to go wild on paper and draw an exclusive pattern, then the Internet will provide a huge selection of various designs and ornaments. You can view such pictures, combine them, and ultimately draw something of your own, simply based on the selected pictures. Or just stop at one pattern and draw only that. In any case, the picture will turn out beautiful and interesting.

Some subtleties
The cores of gel pens are usually thick, which allows the artist to draw using an extraordinary dotting method called dotwork. Since colored tools always don’t draw very well, graphics with a black gel pen will be much richer and of better quality. It is important to remember that the gel paste tends to dry out quickly, so the stick must be used within a few weeks, otherwise it will stop drawing. Graphics applied with a black gel pen will lose some shine and color after 2-3 days from the date of drawing. You must draw lines on the paper very carefully, since it will be impossible to wipe them off. It is also important not to forget that you cannot touch the finished drawing, because the gel can be smeared on the surface of the paper.
What else is important to remember?
Graphics with a gel pen should be applied in accordance with the position of the fibers of the sheet, that is, from top to bottom. The painted part should not be touched with your finger, otherwise you can change the saturation of the lines. It is best to choose high-density paper for drawing, and work with light pressure, because the gel paste has the property of “pulling” the sheet. If gross errors occur during drawing, which simply need to be removed, use white or other covering materials. We must remember that graphics with a gel pen require the precision and accuracy of the artist. Of course, the first time the drawing may not be of very high quality. But everything comes with experience. Over time, the drawings will become clear, and the confident hand of a master of his craft will be felt in them.
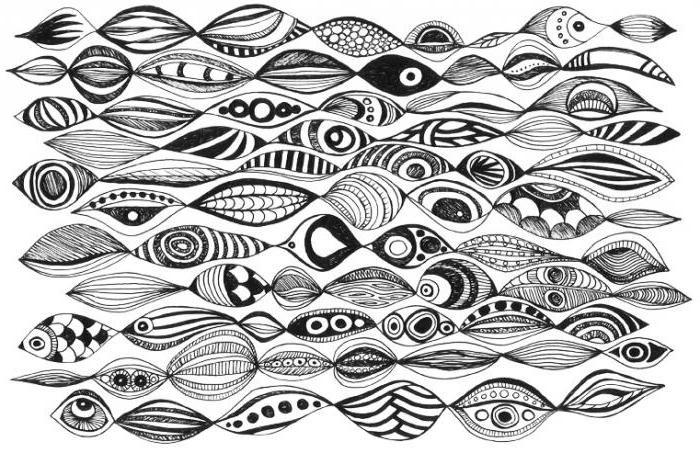
Magic fish. Master class on drawing with a gel pen.
Author: Fedorova Larisa Zinovievna, primary school teacher.Place of work: MBOU "Bushevetskaya NOSH" Tver region, Bologovsky district.
Goal of the work: creating conditions for experimental activities of students.
Tasks:- introduce children to the technique of drawing with a gel pen;
- cultivate accuracy and patience;
- development of fine motor skills of the hands;
- promote individualization, self-expression, self-realization.
Purpose: This master class will be useful for primary school teachers, students and their parents.
Materials for work: black gel pen, pencil, eraser, sketchbook sheet (A4 format).
I work as a primary school teacher and lead the “Crazy Hands” club. With our students in our circle lessons, we draw a lot with gouache, watercolors, and colored pencils. But when a child draws with pencils, his hand gets tired very quickly because he puts pressure on the pencil. The brush must be kept suspended at all times. This is also not entirely convenient. This time I decided to try drawing with them with gel pens. I looked at a lot of drawings on the Internet. They amazed me with their expressiveness, contrast, and graphic quality.
Why are the drawings done with a helium pen and not a regular one? Drawings with a gel pen are clear and contrasting. When drawing with a gel pen, we will truly enjoy our work. The gel pen does not smear, does not scratch paper, and does not freeze in cold weather.
Everyone can draw elementary forms, but, ultimately, it is from them that the picture is created. Many graphic elements are simple and accessible to children: circle, square, triangle, dot, wavy line, three crossed lines (snowflake) and others.
Despite the simplicity of the elements, you can create very interesting paintings with a gel pen, similar to graphics, Chinese or Japanese painting (the “Tree of Life” drawing). The drawing is laconic and complete.
And so, let's get down to our work.
1. Let's draw a fish like this.
On a sheet of paper we draw our fish with a simple pencil. Here we must remember that a gel pen does not draw well with a pencil, so we draw the outline with a simple pencil with a very thin, maybe even a broken line.

2. We divide the body of our fish into parts.

3. We paint each part.


4. Our sketch is ready. Now you can start working with a gel pen. We begin to color each part in turn.


5. Our fish is ready. Now let's draw the algae.

6. Our drawing is ready. I hope you have a lot of fun drawing this fish.
I wish you all success.
After all, I do design and quite often I have to make sketches on paper, although of course these sketches cannot stand on par with well-drawn illustrations.
I started drawing with gel when I was in school. Even then, these illustrations amazed me with their expressiveness, contrast, and graphic quality.
Why are the drawings done with a helium pen and not a regular one? Drawings with a gel pen are clear and contrasting. When drawing with a gel pen, I really enjoy my work and recommend this activity for the soul to everyone.
(function(w, d, n, s, t) ( w[n] = w[n] || ; w[n].push(function() ( Ya.Context.AdvManager.render(( blockId: "R-A -269783-9", renderTo: "yandex_rtb_R-A-269783-9", async: true )); )); t = d.getElementsByTagName("script"); s = d.createElement("script"); s .type = "text/javascript"; s.src = "//an.yandex.ru/system/context.js"; s.async = true; t.parentNode.insertBefore(s, t); ))(this , this.document, "yandexContextAsyncCallbacks");
If you draw with a gel pen, then despite your experience, you should first make sketches with a regular pencil. It will be a great shame to spoil the drawing if you decide to change something. The gel washes off quite poorly, you won’t be able to do it unnoticed. You can correct the drawing only if you use some external dye such as white.
One of the features worth noting is that the gel slightly tightens the pattern after drying. This should be taken into account while working.
(function(w, d, n, s, t) ( w[n] = w[n] || ; w[n].push(function() ( Ya.Context.AdvManager.render(( blockId: "R-A -269783-10", renderTo: "yandex_rtb_R-A-269783-10", async: true )); )); t = d.getElementsByTagName("script"); s = d.createElement("script"); s .type = "text/javascript"; s.src = "//an.yandex.ru/system/context.js"; s.async = true; t.parentNode.insertBefore(s, t); ))(this , this.document, "yandexContextAsyncCallbacks");
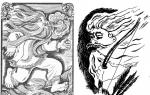
After I began to periodically make sketches on paper with a gel pen, I became very interested in how others do it. I collected the most interesting illustrations in this small selection of gel pen drawings.


(function(w, d, n, s, t) ( w[n] = w[n] || ; w[n].push(function() ( Ya.Context.AdvManager.render(( blockId: "R-A -269783-11", renderTo: "yandex_rtb_R-A-269783-11", async: true )); )); t = d.getElementsByTagName("script"); s = d.createElement("script"); s .type = "text/javascript"; s.src = "//an.yandex.ru/system/context.js"; s.async = true; t.parentNode.insertBefore(s, t); ))(this , this.document, "yandexContextAsyncCallbacks");
These are, of course, not my works, but as soon as I have free time, I will try to finish my collection of gel paintings and post them on the blog.
Which require the use of a regular pen, their technique is best suited for beginning artists. The only difficulty in creating such images is the need to take into account the characteristics of a specific type of working tool (gel or ball type).
Having mastered the basic skills of drawing with paste, a beginner will be able to decorate his notebook with colorful pictures or create a portrait of a real person with features characteristic of his appearance.
Pen drawings for beginners will turn out better if, when choosing a working tool, the artist takes into account the peculiarities of using each type.
When creating images using a gel pen, it is recommended to pay special attention to:
- No excessively oily structure of the rod filler. If the paste is greasy, then when working with images, previously drawn lines and details will be blurred, which will provoke the need to start work again.
- The ability to create variations in line thickness with a specific rod. If a worksheet of paper is placed on the page of an open, thick book, the lines created by a quality gel pen will be thicker than the actual diameter of the lead.
- To create finer lines, you need to place the paper on a hard, perfectly flat surface, such as a polished wooden table or glass.
The most significant features of the use of ballpoint pens by novice artists are:
- The need to avoid touching the working surface with your hands while creating an image, since fingerprints from ballpoint pens cannot be completely removed from the paper. This is especially true if a beginner works with shading and shading with a pen.
- Possibility to achieve different halftones using only one knob. Variations in shades arise due to different pressure on the rod, the tilt of the pen itself and the density of the strokes applied.
- To apply hatching correctly, it is necessary to mark the dividing line between the 2 planes. Below this line, the ballpoint pen strokes should be placed horizontally, and above it – vertically.
What can be depicted in black and white
Creating simple drawings in black and white is suitable not only for experienced artists, but also for beginners. This work does not require a lot of time and special skills.

Using a black pen and a white sheet of paper you can draw:
- pets (they can look either realistic or cartoon style);
- wild animals;
- children;
- adults (including full portraits and self-portraits);
- characters from comics, films, books that are in motion and are part of an integral composition;
- anime characters;
- food products (both individual and ready-made meals);
- inanimate objects that are part of everyday life (for example, furniture, toothbrushes, dishes).
Drawing in a laconic black and white style should follow the basic steps formulated by professional artists to help fellow newcomers:
- Select the source image for sketching. It is recommended to search for pictures on the Internet, since the large number of options presented there will help each person find a picture that suits his internal state, as well as existing skills.
- Print the picture on a black and white printer.
- Place the source under the work surface. The sheet of paper on which a beginner plans to draw should be of medium density so that it is possible to view the contours of the original image.
- Using a black gel pen, pressing lightly on the rod, redraw the contours of the source onto the work surface.
- Complete the details of the composition, outline the outline and apply shading, shadows and penumbra in the right places using a ballpoint pen.
Easy pen drawings
Pen drawings for beginners should have a minimum number of elements so that the artist has the opportunity to concentrate on refining a specific detail, avoiding distraction.
| Example of a pen drawing | |
 |
|
 |
|
Beautiful drawings in different colors
If you have multi-colored pens, you will be able to create bright drawings, which can later be used to decorate diaries or design living spaces.
| Example of a pen drawing | Sequence of actions to create it |
 |
|
 |
|
Cool drawings
Pen drawings for beginners usually reflect the emotional state of the artists.
For those who are in a good mood, the following sources are suitable:
| Example of a pen drawing | Sequence of actions to create it |
 |
|
 |
|
Anime
The following options are suitable as sources for drawing anime-style pictures with a pen:
| Example of a pen drawing | Sequence of actions to create it |
 |
|
 |
|
Animals
Pen drawings for beginners depicting animals should not imply that the artist has any special skills.
Such pictures, as well as other options for drawing sources, must be selected according to the principle “the fewer details, the better”:
| Example of a pen drawing | Sequence of actions to create it |
 |
|
 |
|
People
For beginning artists, one of the most difficult tasks is creating a drawing of a person using a pen.
| Example of a pen drawing | Sequence of actions to create it |
 |
|
 |
|
Hand
It is recommended to draw the upper limbs with a pen in accordance with the generally accepted algorithm:
- Mark the general contour of the hand using reference points located in the areas of the intended wrist (2 points) and fingers (5 points).
- Draw the outline of the fingers using vertical lines of varying lengths.
- Round the contours of the fingers, giving them a realistic shape.

- Adjust the contour of the hand. Make it clearer by recirculating the boundaries of the picture.
- Outline the areas of the phalanges of the fingers.
- Finish the drawing using shading.
Eye
You can draw an eye using a pen like this:
- Draw the approximate shape of the future eye using 3 semicircles with an upward curve, located at different distances from each other, and 2 semicircles, curved downwards, drawn as close to each other as possible.
- Adjust the borders of the drawing,
- Draw a circle in the inner area of the resulting figure.
- Draw a smaller circle (pupil) inside the main figure.

- Draw highlights on the pupil: 1 small one, located just above the central area of the pupil, and 1 larger one, located to the left of the viewer.
- Use shading to recreate shadows.
- Darken the pupil.
- Draw the eyelashes using smoothly curved lines extending from the upper and lower eyelids.
Being the handy tool of every artist, the pen, regardless of whether he is a beginner or an experienced artist, allows him to spontaneously create drawings, giving in to the creative impulse anywhere.
Such images can not only decorate notebooks, diaries or notepads, but also allow a person to throw out accumulated emotions, relax and stabilize his psycho-emotional state.
Video about drawing with a pen
Pen drawings for beginners - how to draw an ant:
Who wants it?
Drawing and ink from scratch
I will start this post with “wanting”, because in the matter of acquiring the ability to draw with a pen/pen, personal desire is even more important than talent and thin. skills.
Typically, drawing in any other technique begins with pencil construction, corrections, possibly changing the composition in the process, and therefore active use. In general, no one bothers you to make a pencil drawing according to all the rules for drawing with a pen/pen, but this post is just about how to learn to do without it.
First of all, those who want to learn how to draw “without an eraser” should have patience, a small amount of time (but every day!) and a lot of desire. Why do I attach such importance to desire? Because very often, especially at first, you will be disappointed in your work, and as a result, in yourself, in your skills, and only desire will prevent you from giving up on this whole thing from a high tree and deciding that you can do it without this skill. live in peace.
Below, I will show some techniques that will help you get a normal result, and also give examples of mistakes and unsuccessful jobs that you should not be afraid of. I hope all this will help maintain the desire to learn and prevent feelings of inferiority from appearing =)
So, the tools:
Pens. You can draw with ballpoint pens, gel pens, or something else. Now I prefer to draw, but at first it was either ink or liners.
I had to draw with reusable “Uni pin” fine line liners, but apparently they are either for smoother paper, or we didn’t agree with them in Feng Shui, but their rod wears out faster than the refill runs out. We only refilled them once, and that was when Leo was writing in his notebook and not drawing. Perhaps they are not erased, and the rod goes away when pressed into the body, but the result is the same. The most popular sizes are 0.1 and 0.2, sometimes I use 0.3, but that’s when I don’t have 02, and very rarely 0.05 for very small details, when I even decide to draw them.
Liners from Faber Castell are very similar to “Uni pin”, one of the series even has the same cases, only the inscription is different (I don’t have them now, so the photo is from a different series)
Another option is Centropen liners. They are one and a half times cheaper than "Uni pin" and two times cheaper than "Faber Castell", they are not inferior in quality, the rod still goes out, perhaps a little slower. The only difference is that they are disposable, but considering the fact that the rest are thrown away before refilling, the savings are not bad.
At the moment, Leo gave up on liners - at such a cost, it turned out that it would be cheaper to buy and forget about the problems with the rods.
Paper. Unlike drawings, it’s most convenient for me to draw with a pen in notebooks - all the waste paper is together, it doesn’t get lost anywhere and is always at hand. For works and ink I use, and for liners I have a cheap Chinese notebook with paper of average quality, so that it would not be a pity, because the paper goes out in reams, and the drawings there, for the most part, are not the kind that you should be proud of right now.
The paper is grayish, with a density of 98 g/m2, which is quite enough for double-sided drawings.
When I’ve copied this notebook, I’ll switch to good ones with beautiful white paper and nice bindings, which have been waiting for me for a long time =)
Now we take the tools in our hands and start drawing.
Basic rules/tips:
1. draw anything: objects on the table, furniture in the room, chandelier, interior, view from the window, flowers on the windowsill, etc. or from photographs (animals, birds, people, but don’t get too carried away with photographs, the main thing is nature)
2. draw without construction as it turns out: clumsily, with errors, extra lines, compositionally incorrect, etc.
3. at first it is better to take a thinner pen so as not to blacken too much
4. you need to draw lines quickly, not tremble over every millimeter (at first there will be 1000 of them and 1 line, then only 1)
5. every day. Even the busiest person can find 10-15, even 30 minutes of time and devote it to drawing; everything else is excuses and lack of that very desire. Leo knows very well and first-hand what deadly busyness is (1 job, 2 hack jobs, full-time study + diploma - and Leo had this). Therefore, I ask you not to write to me in PM and comments, saying, “I would love to, but I don’t have time,” there is simply no desire and there is laziness, and there is no need or point in notifying me about this - it’s not impressive, it doesn’t evoke pity or sympathy.
6. Before evaluating the result of your work, you need to copy 100 pages, no less. At the time of creating this post (08/26/2011), I had 101 pages copied, I draw on both sides of the sheet, fortunately, the thickness of the paper allows it, and there is no point in putting each such work in a frame. Many pages have 2-3 small drawings.
7. how to help yourself not to be lazy: always carry a pen with you. When you are sitting somewhere: in a cafe, park, in line, at home, with friends, etc. - take it out and put it next to you. The brain will get used to the constant potential opportunity to draw and will take advantage of this opportunity =)
How to make your life easier at first:
You can build a drawing with dots. Actually, the construction is more in the mind than on paper, but by putting a point in some key place, we create a visual support for ourselves
Connecting the dots
Now you can tint and detail, but in sketches of this type, this is unnecessary. Here it is important to convey shape, movement, and somewhere to emphasize the volume with a careless touch.
I have no more than 10 completed works in my entire notebook.
Most often my ducks look like this
The main mistakes that will definitely be:
500 lines, when you want to draw one - patience, my friend, everything will happen, but not right away.
Problems with the composition, crawling out of the sheet or too much space from some edge. To avoid this, you can at the very beginning mark the extreme points of the object, at least by eye
Disproportionality (it turned out to be a very beaked duck). Heals with time and practice
Incorrect perspective, general clumsiness (here the perspective is lame on all four legs, the verticals are generally gloomy)
The jar of honey has gone crazy
What is necessary and useful to draw:
Interior - no matter where you live, you can always draw what it looks like without even getting up from the sofa/chair/armchair/bed
All sorts of objects, household appliances, dishes, etc. (above there was a meat grinder - it’s really tough, especially from different angles).
Just a box
If you have one, you can draw a pet from different angles when it is static (you also need to draw it in dynamics, but this is more difficult and later)
It is good to draw indoor plants in such a way as to convey their volume and make the appearance of the plant clear.
Leo's houseplant is oak, it's so obvious =)
For those who don’t have indoor plants, don’t be lazy and buy some kind of flower, put it in a vase/glass and draw
It is also very useful to draw somewhere during a walk - we find a bench/stump, sit down and draw the first thing that catches our eye.
It is not necessary to draw every leaf, the most important thing is to convey the impression, the volume
Or you can draw it if the object is piecemeal
A good subject for drawing is any stone. It is necessary to repeat the shape, convey the texture and not lose the volume (Leo still loses it from time to time)
Drawing from photographs.
Also good, but in moderation and quickly. Open the photo, spend 5-7 minutes on it and move on to the next one
This way you can draw things that are not found in everyday life, all kinds of animals and birds.
Leo likes to take photographs of ducks in Vinnitsa and somewhere on ponds, and then in the evenings he draws them in detail or just as a sketch
The black and red musk duck drake was so beautiful that Leo couldn’t resist going into details
In general, nothing difficult if you regularly devote time to practice.
If someone has problems with self-motivation and physically needs some kind of external kick in the form of: role model/ridicule, competition/mutual assistance, regularity - .
Good luck and best wishes to everyone who is interested! =)
I kindly ask those who post my reviews and articles on their websites - I am not against borrowing my materials, but please sign the author and provide a link to the source text:
Author: Ater Leo
Taken: