Chemistry and production of watercolor paints. Watercolor paints
You can paint anything with watercolors - from realistic portrait to invented alien worlds. Many people think watercolor is a complex artistic tool. But all you really need to learn how to paint with watercolors is to just start. We have selected 11 tips for you, thanks to which you will become 11 steps closer to understanding the art of watercolor drawing.
1. Don't be afraid to get your hands dirty!
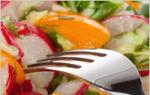
If you've never drawn before, it's time to get started. Open the album, create interesting textures and stains with watercolors so as not to freeze in front of a white sheet of paper. Start from them in search of a plot. Color pages can be bright and exciting or create a calm, melancholic mood. Color or texture may suggest the next step - or maybe you're itching to paint without it.
Illustration from the book “The World of Watercolors”.
2. Find your watercolor paper
The result of the work largely depends on the quality of the watercolor paper. Go to a bookstore and choose 5-10 pieces different sheets watercolor paper “for testing”. Be sure to make notes on each sheet (type, weight of paper and results of working with it). A suitable paper weight for beginners is 300 g/m2, some professionals prefer 600 g/m2. There are other types of watercolor paper, such as NOT paper and rough texture paper, or cold pressed paper.

3. Use professional paints
Even novice artists should purchase professional watercolor paints. Unlike cheap analogues art paints lay down beautifully and spread on paper.
“I prefer tubes rather than pans: firstly, you don’t have to wait for the paint to soften and become workable, and secondly, it’s easier to create rich, dark mixtures with tube paint.”Billy Showell
It is true that artist paints are more expensive, but they will also last longer. They dilute better and therefore are not used up so quickly.
Advice. Try new colors and others art materials as often as possible. Experiment. Don't become a hostage to one habit
4. Observe and consider before you take up the brush
Before drawing, study the structure of the object. Look at it as if you were seeing it for the first time, look carefully, take notes, sketches, get familiar with textures and details that you have never paid attention to. For example, observe the spiral arrangement of the leaves or the whorls along the veins of the stem.

You get double benefits from drawing plants - first you meditate while looking at it, and then you get real pleasure from drawing. Isn't it wonderful? @miftvorchestvo
Try to mentally break down what you see into its components. Select the main shapes. See how they overlap each other. Imagine the landscape as a stage set. Pay attention to what is closest and what is further away.
5. Learn to mix paints
Try mixing colors to get an idea of what shades you can achieve with your paint set. Mix two colors first, then add a third to them. Experiment!
You will love creating such beautiful colors and variations of shades and tones, the number of them is almost inexhaustible.
Focus on yourself. You can do or very realistic drawings or very non-trivial. Your task is to collect paints whose properties you will know, which will allow you to create the desired shades with a guaranteed good result.

By mixing pure pigments, you can create cool, warm or grayish variations of the same color. Illustration from the book “Song of Colors”
6. Start with sparing expression
If you make pencil sketches or sketches, you can diversify your watercolor drawings by adding accents. You don't have to color the entire page; sometimes a few well-placed brush strokes create the most powerful effect.

Careless dotted watercolor strokes in sketches are the signature style of Felix Scheinberger. Illustration from the book “Watercolor Sketching”
7. Use liquid primer for watercolors
Liquid primer for watercolors is applied to the paper before starting work and allows you to easily remove dried paint if necessary. This is especially important when working with intense or persistent pigments: you don’t have to worry about “staining” the paper in the area of highlights. Before using it, practice in a sketchbook, as the surface for drawing will be quite slippery.
To remove paint from those areas where it was not needed (you accidentally went beyond the edges or you need to create highlights), simply wash off the paint with a clean, dampened brush or sponge.
8. Learn the art of glazing
Artists call glazing a technique for obtaining deep iridescent colors by applying translucent paints on top of the main one. The glaze technique is a great way to convey the finest color scheme. The paints are applied very delicately, layer by layer, and after drying the details of the last layer are worked out.

Illustration from the book “Song of Colors”
9. Dry brush technique
This technique can be used to draw animal fur or small hairs on fruits such as kiwi.
Apply paint to the brush and remove excess with a napkin. Straighten the brush hairs. Apply paint to a dry surface previously painted in the background color. Work in small strokes in one direction, imitating hairs on the surface.

Kiwi using dry brush technique. Illustration from the book
* The calculations use average data for Russia
Watercolor paints have been known since ancient times. It is hardly possible to find a person who has never encountered them in his entire life. Even if you are not an artist or interested in drawing, most likely you painted with watercolors more than once as a child. Watercolor art paints are fairly finely ground (finely dispersed) pigments of the highest grades, mixed with vegetable glue, gum arabic, or with dextrin, obtained by heating starch in the presence of acids. All of these main components of paints are water-soluble, which is of no small importance. This mixture also includes a plasticizer, which can be honey or glycerin, and an antiseptic (phenol).
There are quite high demands placed on watercolor paints. They should have a fairly high degree of transparency, so no white is added to them. Once dry on paper, quality paints should not rub off with light pressure from a cotton swab. In addition, they must be resistant to sunlight and not fade in it. They should be easy to pick up with a wet brush and lay flat on the paper in an even layer, without penetrating onto the back side of the sheet and being partially washed off with water. Nice colors sticky and quite viscous, do not crack when dry and are easily dissolved with water. Watercolor paints acquire all these qualities due to high-quality binders, which may include gum resins (gums), the aforementioned glues, gum arabic, honey, dextrin, molasses, cherry, plum, apricot and other glues obtained from stone fruit trees.
Watercolor paints are sold in dry form in tablets and tiles packed in plastic boxes - cuvettes (mainly, watercolor paints in such packaging are intended for children and for working on small projects and sketches), as well as in a paste form in tubes ( For professional artists and large-scale works). Gouache (poster) paints are very similar in composition to watercolor paints. But in addition to the above components, gouache also contains white, which gives it a more dense, opaque, plastic and at the same time fluid consistency. Gouache has a higher hiding power than watercolor, as well as a matte and velvety finish. Gouache paints are produced in tubes and plastic jars.
Watercolor paints are made by grinding powdered pigments into a water-soluble binder that consists primarily of gum arabic but also includes glycerin as a plasticizer, a wetting agent such as ox gall, and (if necessary) a thickening agent such as gum tragacanth. Other types of thickeners include starch, dextrin or swelling clay. Usually a preservative is also added to paints, which acts as an antifungal and bactericidal agent. In addition, when absolutely necessary to control the properties of a particular paint, fillers are sometimes added to other ingredients that can produce a white color. Each of the pigments used in paint has different requirements. Of great importance for the quality of the finished product is the exact observance of the specified proportions of one or more ingredients. Therefore, the process of producing watercolor paints is considered complex, requiring workers to have extensive experience in this field and relevant knowledge.
Regardless of the method of packaging watercolor paints, the production technique is not fundamentally different and involves the following stages: mixing the binder with the pigment, grinding the mixture, drying to a viscous consistency, filling cups or tubes with paint, packaging.
Mechanical tipping mixers are typically used to mix the pigments with the binder. When producing small quantities of paint, batches can also be prepared manually in metal enamel tanks with mixing using wooden spatulas. First, the binder is loaded into the mixer, and then pigment in dry form and diluted with water (aqueous paste) is added to it in small portions. Grinding of watercolor paints is carried out on three-roller paint grinding machines. Since some pigments are quite sensitive to iron, experts advise using rollers made of granite or porphyry, and replacing the steel skiving knife in standard equipment with a wooden one. Although the latter option will be less durable, the quality of the products you produce will be higher.
Ready ideas for your business
To grind the pigment, a paint grinding machine is used, with which the pigment is thoroughly mixed with the binder until a homogeneous paint paste is formed. The quality and quantity of grinding directly depends on the degree of grinding and hardness of the pigments, the amount of moisture in the mixture (the degree of wettability of the pigments), on the viscosity of the binder, on the speed of rotation of the shafts and the amount of their clamping. For example, when using a coarse pigment, additional grinding will be required, which deteriorates the quality of the paint, contaminating it with materials when wiping the rollers and dust from the metal knife. To avoid this, paste containing such pigments should not be ground more than five times. To grind watercolor paints, you will need additional equipment - separate paint grinders for each group of pigments that are close to each other in shade (a separate machine is obtained for white paints, for dark brown and black, for yellow, red and orange, for green, blue and purple) .
When making watercolor pastes, manufacturers usually use binders that have been previously diluted in solutions. This is due to the fact that when using too thick a solution during grinding, it is impossible to obtain a sufficiently homogeneous paint paste. In addition, the pigment in this case is not sufficiently saturated with the binder.
The ground paint is sent for drying to remove excess moisture from the mixture and obtain a thick paste for packaging in cups or tubes. Drying of the paste is carried out in special drying chambers or on granite slabs at a temperature of about 35-40 ° C. After removing a certain part of the water, the thickened paste is carefully rolled into ribbons one centimeter thick, cut into individual squares, rectangles or circles corresponding to the area of the cuvette, and placed in cups. The boxes are closed and labels are glued to them. There is also a more budget-friendly packaging method, in which the paint is placed in sheets of cellophane, and then wrapped in foil and paper with a label. When producing watercolor paints in tubes, filling the tubes with paste is carried out automatically by tube filling machines. Then, in the latter case, more glycerin is added to the paint, which prevents them from drying out quickly and gives them greater solubility. On the other hand, if paint is not used in tubes for a long time, separation of the pigment from the binder may occur.
Previously, watercolor paints were produced with GOST markings, which have now been replaced by TU. This is due to the cessation of production in Russia of the factory equipment necessary for the production of such products. However, most watercolor and gouache paint industries still use mostly domestic (often very outdated) paints. Some equipment can also be purchased from non-core supplier companies. However, some components of the line (for example, an installation for watercolor paints) will have to be purchased separately.
To accommodate such equipment, an area of 60 square meters will be required. meters for the production workshop. In addition, it is necessary to allocate at least another 20 square meters. meters for warehouses of raw materials and finished products. Paints are compact goods, but require special storage conditions. They must be stored indoors at a temperature not lower than 0 ° C at a distance of at least half a meter from heating devices.
Ready ideas for your business
Watercolor and gouache, similar in production technology, are among the most popular types school paints and are adhesive and water-soluble. Since they use natural pigments as a coloring element, such paints are considered safe and do not require mandatory certification. However, most manufacturers issue a sanitary and epidemiological certificate for such products, which confirms it high quality and inspires more consumer confidence. Please note: in addition to the marking of the certification center, the packaging of your paints must contain information about the manufacturer, manufacturing plant and product composition. The safest paints are suitable for children, without chemical dyes and fragrances, only based on corn glue, dextrin and natural honey-containing additives. Both watercolor and gouache have an unlimited shelf life. Although over time the paints may well dry out a little, to restore their working properties, simply add a little water.
The issue of the assortment of an enterprise producing artistic paints deserves special attention. If your products are intended for professional artists, then the latter use only primary colors, preferring to create the desired shades by mixing several paints. But for children, on the contrary, the more colors of paint, the better. According to most manufacturers, a palette consisting of 12 colors is considered optimal, since it includes all the main shades and at the same time its packaging is quite convenient and compact, and does not take up much space in the briefcase.
Equally important for consumers when choosing paints is not only the number of shades in the set, but also its price. As a rule, 1-2 primary colors in a set are used up the fastest, regardless of the breadth of the palette. The more colors it contains, the more expensive the set is for the same consumption. Therefore, purchasing expensive kits is not profitable for parents. To attract customers, manufacturers often combine regular paints and decorative ones (with glitter, fluorescent, metallic effect, etc.) in one package. The cost of such sets is slightly higher than usual, but they are of interest.
Don't forget about the design of your paints. Convenient and durable boxes with transparent lids so that customers can see their contents, and bright labels - all these, at first glance, little things are the key to the success of your company.
Paints are sold through stationery stores, children's goods stores, super and hypermarkets, art supply stores, etc. According to preliminary estimates, the minimum costs for organizing the production of watercolor and gouache paints will be from 300 thousand rubles. This amount includes the purchase of a minimum production equipment, rental of premises for a workshop, purchase of raw materials and packaging (plastic cuvettes), printing of labels. Payback periods depend on many factors (production volumes, assortment, product quality, the target audience etc.) and range from 9 months.
Ready ideas for your business
Sysoeva Lilia149 people are studying this business today.
In 30 days, this business was viewed 46,634 times.
Calculator for calculating the profitability of this business
rent + salaries + public utilities and so on. rub.

The cost of opening your own manufacturing company musical instruments can amount to several tens of thousands of rubles - something like handicraft production - and several million, and sometimes even...

The total costs of organizing a small production of crayons range from 100 thousand rubles (including the purchase of raw materials).

To open a small stationery store you will need from 400-450 thousand rubles. The markup on stationery reaches 200% for cheap products and 50-70% for more expensive products. We pay back the deadlines...

The cost of organizing this type of business varies widely; a small store, including the purchase of equipment and goods and arrangement, can be opened within 500 thousand rubles. Large hyperma...

According to various sources, the minimum batch of toys according to the customer’s sketches (that is, the complete manufacturing process...

According to the owners of birch bark production, this is a profitable business. A company with eight employees with established sales can...

In order to open a philately store, you will need about 200 thousand rubles. Opening a store selling collectibles is profitable only in big city, or in a populated area...
Watercolor (French aquarelle - watery; Italian acquarello) is a painting technique that uses special watercolor paints that, when dissolved in water, form a transparent suspension of fine pigment and thereby allow you to create the effect of lightness, airiness and subtle color transitions. Watercolor paints are usually applied to paper, which is often pre-moistened with water to achieve a special blurred stroke shape.
Watercolor painting came into use later than other types of painting; back in 1829, Montaber mentioned it only in passing, as an art that did not deserve serious attention. However, despite its late appearance, it is a short time has made such progress that it can compete with painting oil paints. Watercolor only became a strong and effective painting when they began to use transparent paints with retouching of shadows. Painting with water paints, but thick and opaque (painting, gouache) existed much earlier than transparent watercolors.
Watercolor is one of the poetic types of painting. A lyrical, complete sketch or short story is often called a watercolor. They compare with her musical composition, enchanting with delicate transparent melodies. Watercolors can convey the serene blue of the sky, the lace of clouds, the veil of fog. It allows you to capture short-term natural phenomena.
But watercolors are also available for major works, graphic and pictorial, chamber, monumental, landscapes and still lifes, portraits and complex compositions.
A sheet of white grainy paper, a box of paints, a soft, obedient brush, water in a small vessel - that’s all > a watercolorist. Plus to this - keen eye, a steady hand, knowledge of materials and mastery of the technique of this type of painting.
You can write on wet or dry paper immediately, in full color. Can work in multilayer technique, gradually clarifying the color state, each particular. You can choose a mixed technique: go from the general to the detail or, conversely, from the detail to the general, whole. But in any case, it is impossible or almost impossible to correct a damaged place: watercolor cannot tolerate the slightest wear and tear, torture, or obscurity. Transparency and shine are given to it by paper, which should be white and clean. As a rule, a watercolorist does not need whitewash.
Back at the end of the 15th century, an outstanding master German Renaissance A. Gyor created many magnificent watercolors. These were landscapes, images of animals and plants.
But watercolor became fully established in European countries relatively recently - in the late 17th - early 18th centuries, English painters were among the first to appreciate it; in the 19th century, W. Turner, the singer of London fogs and foamy waves, gloomy rocks and sunlight, became especially famous for his watercolors .
In Russia of the century before last there were many outstanding watercolorists. K. P. Bryullov brought sheets with genre scenes, portraits and landscapes to filigree completion. A. A. Ivanov wrote simply and easily, combining lively, impeccable drawing with clean, rich colors.
P. A. Fedotov, I. N. Kramskoy, N. A. Yaroshenko, V. D. Polenov, I. E. Repin, V. A. Serov, M. A. Vrubel, V. I. Surikov. each of them made a rich contribution to the Russian watercolor school.
Artists often use watercolor in combination with other materials: gouache, tempera, charcoal. But in this case, its main qualities are lost - saturation, transparency, luminosity, i.e. exactly what distinguishes watercolor from any other technique.
Gum arabic (from Latin gummi - gum and arabicus - Arabian) is a viscous transparent liquid secreted by some types of acacias. Belongs to a group of plant substances (colloids) that are highly soluble in water. In terms of its composition, gum arabic is not a chemically pure substance. It's a mixture of complex organic compounds, consisting mostly of glucoside-humic acids (for example, arabic acid and its calcium, magnesium and potassium salts). It is used in the production of watercolor paints as an adhesive. After drying, it forms a transparent, brittle film that is not prone to cracking and is not hygroscopic.
Honey is a mixture of equal amounts of fructose and glucose with an admixture of water (16 - 18%), wax and a small amount of protein substances.
Molasses is a product obtained by saccharification (hydrolysis) of starch (mainly potato and maize) with dilute acids, followed by filtering and boiling the syrup to the desired consistency.
Glycerin is a thick, syrupy liquid that can be mixed with water in any proportion. Glycerin belongs to the group of trihydric alcohols. It is very hygroscopic and is added to the binder of watercolor paints to preserve them in a semi-dry state.
Pigments (from Latin pigmentum - paint), in chemistry - colored chemical compounds, used in the form of fine powders for dyeing plastics, rubber, chemical fibers, and making paints. They are divided into organic and inorganic.
Theoretical part.
Composition and properties of paints.
Watercolor paints are prepared using water-soluble binders, mainly glues of vegetable origin, which is why they are called water paints. Paints for watercolor painting must have the following qualities.
Great transparency, because all the beauty of the colorful tone when applied in a thin layer lies in this property. It works well with a damp brush and washes out easily. The paint layer should be easily washed off with water from the surface of the paper or primer.
Watercolor paint, diluted with water, should lie smoothly on the paper and not form spots or dots. When exposed to direct sunlight, the paint must be lightfast and not change color. After drying, give a durable, non-cracking layer. Do not penetrate the back of the paper.
The main components of watercolor paint are dye and water, but there are other essential components. First of all, substances that bind paint to paper, such as gum arabic or wood glues - substances with increased stickiness. Next, you need viscous substances, they will prevent the paint from spreading over the paper, making it lie in an even layer; Honey, molasses, and glycerin are good for this. And the last addition is an antiseptic and disinfectant. After all, we are dealing with substances of plant origin, and they must be protected from the action of microorganisms (moldy fungi that will definitely want to feed on our paints).
Production of paints.
Watercolor paints are available in porcelain cups and tubes. The production technique for these types of paints is not fundamentally different and mainly goes through the following processing stages:
1) mixing the binder with the pigment;
2) grinding the mixture;
3) drying to a viscous consistency;
4) filling cups or tubes with paint;
5) packaging.
To mix pigments with a binder, mechanical mixers with a tilting body are usually used. For small quantities, batches are most often prepared by hand in metal enamel tanks using wooden spatulas. The binder is loaded into the mixer and the pigment is introduced in small portions in dry form or as an aqueous paste.
When grinding on a paint grinding machine, the pigment is thoroughly mixed with the binder into a homogeneous paint paste.
The ground paint is sent for drying in order to remove excess moisture and obtain a thick paste for packaging in cups or tubes.
The paste is dried in special drying chambers or on granite slabs at a temperature of 35 - 40° C.
After removing part of the water, the thickened paste is rolled out into ribbons 1 cm thick, cut into individual square pieces the size of the cuvette area and placed in a cup.
The paint is placed on top with a piece of cellophane and finally wrapped in foil and paper with a label. When producing watercolor paints in tubes, the tubes are filled with paste automatically by tube filling machines.
Features of watercolor paints.
Watercolor painting is transparent, clean and bright in tone, which is difficult to achieve through glazing with oil paints. In watercolor it is easier to achieve the finest shades and transitions. Watercolor paints are also used as underpainting for oil painting.
The shade of watercolor paints changes when drying - it becomes lighter. This change occurs from the evaporation of water, due to which the spaces between the pigment particles in the paint are filled with air, the paints reflect light much more. The difference in the refractive indices of air and water causes a change in the color of dried and fresh paint.
Strong dilution of paints with water when applied thinly to paper reduces the amount of binder, and the paint loses its tone and becomes less durable. When applying several layers of watercolor paint to one place, the result is oversaturation with the binder, and stains appear.
When covering paintings done with watercolors, it is very important that all paints are more or less evenly and in sufficient quantities saturated with a binder.
If individual parts of the paint layer contain an insufficient amount of glue, then the varnish, penetrating into the paint layer, creates a different environment for the pigment, not optically similar to the glue, and will greatly change its color. When the paints contain a sufficient amount of binder, then when varnished, their intensity and original shine will be restored.
Practical part.
Old books often contain names of exotic dyes: red sandalwood, quercitron, carmine, sepia, logwood. Some of these dyes are still used today, but in very small quantities, mainly for the preparation of artistic paints. After all, natural dyes with such beautiful names obtained from plants and animals, which is expensive and difficult. But natural dyes are very bright, durable, and lightfast.
It would be interesting to check. But how? Logwood grows in South America, sandalwood grows in South Asia, sepia comes from cuttlefish, carmine comes from cochineal (tiny insects).
And yet you can get natural dyes even at home, even in middle lane our country is quite possible! And plants that are familiar to us contain coloring substances, even if they are not as persistent. Our ancestors often used them. We also tried to extract dyes from plants, and then made watercolor paints based on them.
All dyes were prepared in the same way: by grinding plants or any of their parts and obtaining concentrated decoctions by boiling them for a long time in water.
A very important note: for experiments we took only those plants that are allowed to be collected, and in no case did we use plants taken under protection.
Experiment 1. Preparation of red dye.
We got it from the stem of St. John's wort (the decoction was acidified with table vinegar). You can also use alder bark, which must be placed in water for several days, and then prepared as a decoction. Red dye can also be extracted from the roots of horse sorrel, but in this case it is necessary to add a little aluminum alum to the finished decoction - otherwise the color will be dull.
Experiment 2. Obtaining blue dye
This color was obtained from the roots of elecampane (like St. John's wort, it is a medicinal herb). To do this, the roots were first kept (2-3 hours) in ammonia - an aqueous solution of ammonia. Blue dye can also be obtained from larkspur flowers and bird buckwheat roots.
Experiment 3. Obtaining yellow and brown dye
By decoction of dry onion skins a brown dye was obtained different shades, from almost yellow to dark brown (the result depends on the boiling time). Another source of such dye is dry joster bark.
Experiment 4. Obtaining black dye
The black pigment is obtained from a decoction of berries and roots of the crow. But we got it in another, simpler way: we added iron sulfate to one of the decoctions obtained earlier. Almost all of our decoctions contain tannins such as tannin. And in the presence of ferrous salts they turn black.
After we stocked up on a sufficient amount of thick multi-colored decoctions, we began making watercolor paints. Instead of gum arabic, we used cherry gum as an adhesive, a sap on the trunks that can be collected directly from the trees. True, such glue is difficult to dissolve in water, but to speed up the process we added a little acid.
For paint of each color, 5-7 ml of an adhesive solution of approximately 50% concentration was prepared. Mixed it with equal amount honey, added a little glycerin. A 5% solution of phenol (carbolic acid) was used as an antiseptic. You need very little of this substance, literally a few drops.
All components of the future paint were mixed. The paint base is ready, only the most important thing is missing - the dye. We added it last in the form of a thick decoction, taking about the same amount as we got the base for the paint.
That's the whole procedure. The paint we got was not hard, like they sell in stores. However, artists use semi-liquid watercolor paints in tubes that are similar in consistency.
Light, as if airy, color lines, apparent translucency of the composition - this effect is achieved when using the watercolor technique.
To prepare watercolor paints, you can use mineral, aniline and vegetable paints. Aniline dyes are rarely used, since, when absorbed into the paper, they stain it through and through, as a result of which they cannot be washed off the drawing and weaken the tone. They also do not wash off from the brush.
Watercolor paints are one of the most loved by artists. First of all, watercolor has a lot of various techniques, and secondly, with its help you can create beautiful drawing, even if you don’t know how to draw at all.
These techniques will help beginners learn how to draw, and professionals will refresh their memory and find inspiration and ideas.
1. Painting with a flat brush
Step 1
Draw a square or rectangle to mark the start and end of the layer.
Select a darker shade (it's easier to see) and starting in the top left corner, touch your brush to the paper and gently draw a straight line all the way to the top right corner.
But: Left-handers should draw from the right corner to the left.
Step 2

Fill your brush with paint again.
Start the next stroke from the bottom edge of the first, trying to cover the accumulation of paint that has formed at the bottom of the first stroke.
Hint 1: If the buildup of paint in the first stroke does not flow completely into the second, then increase the angle of your easel to help the paint flow freely.
Hint 2: By increasing the angle of inclination, you also increase the chances of getting uncontrollable paint flows. So try to work faster or have something like a rag or sponge on hand to quickly clean up spills.
Step 3

Repeat the previous step, also trying to cover the accumulation of paint in the top stroke.
Hint 3: You can use the flat edge of the brush to “cut” the beginning of the layer and make it even.
Hint 4: If you want to smooth out the end edge of a layer, then at the end of the stroke, pause and move the brush up and then down as you would with the beginning edge.
Hint 5: If the stroke turns out to be intermittent, then immediately fill the brush with paint and re-stroke it.
Step 4

Repeat the previous steps until the very end. Try to stick to the same paint tone.
Hint 6: You won't believe how different the behavior of brushes, paints and paper can be between different brands. Typically, more expensive and popular brands make your job easier by providing high quality products.
Hint 7: If your strokes are choppy even though your brush is full of paint, you are using paper that is too thick or the paper is too rough in texture. If you come across such paper, spray it with water, blot it with a clean sponge and let it dry. This will make the surface more receptive to your paint.
Step 5

Rinse the brush and squeeze out all remaining water from it. Use your brush to carefully pick up any clumps of paint left on the bottom. finishing touch, but don't take too much paint or you will discolor your drawing.
To create more texture in your design, let it dry at an angle. This will give the paint a more interesting look.
Gradient
Step 1

Draw a square or rectangle. Then dip your brush into a darker shade of paint (mix on your palette) and carefully brush over the stroke.
Step 2

Dry your brush with a sponge or paper towel and dip it again in a lighter shade.
Then draw a new stroke, overlapping the bottom of the previous one. Notice that the left side of the layer has already merged with the previous stroke. Let gravity do its thing.
Step 3

Rinse the brush again and dry it. And then refill the brush with paint and make another stroke. Repeat this process until the very end.
Hint 1: If your stroke breaks or doesn't go on as smoothly as you'd like, quickly refill your brush with paint and repeat the coat.


Step 4
Rinse the brush with clean water, dry it and pick up any remaining paint.
Hint 2: Try this technique when working with different colors and creating interesting transitions.

Watercolor glaze
Step 1

This technique requires improvisation and imagination. Using the example, we will draw an improvised landscape.
First we paint the sky and river with blue paint. We will separate the paint with a small amount of water, this will be a waterfall.
Step 2

Draw the clouds in dark pink color and start drawing the mountain yellow. We will also mark the bottom part of the picture in yellow.
The example uses light and transparent tones so you can see how the layers interact.
Step 3

By mixing cobalt blue and ultramarine blue, we will paint the horizon of the mountain and shade the small yellow slope.
Hint 1: allow each layer to dry. You can use a hair dryer to speed up this process. Keep it at least 25-30 cm away, turn on the cool setting and set the hair dryer to the lightest air flow. No steam or hot air!
Step 4

To shade and add interesting colors, we use Orange color. With its help we will create the shores in the foreground and shade the sky.
Hint 2: If you get droplets of excess paint, rinse and dry your brush as you did in the previous techniques, and pick up the droplets with it.
Step 5

Please note that the images show different paint brushes. You can use the ones you have on hand.
Let's take dark Blue colour and use it to shade the top of the mountain, changing the pressure on the brush and turning it to create an interesting texture.
Step 6

Using the same blue color, let's play with the waterfall by drawing some circles. Sometimes visual clichés become your friends.
Let's rinse the brush and pick up the yellow color, we will use it to add visual details to our shores.
Step 7

After the paint has dried, shade the bubbles in the waterfall with a shade purple. This way we will make them more interesting.
Step 8

We need to link some elements and add trees. In the example, we used round templates for the crowns, but you can draw as you like.
Step 9

We will use brown color to depict tree trunks. We will also use blue to shade the water and sky a little more. Then, using pink, blue and green, we will paint the grass in the foreground.
Step 10

Use a mixture of pink and red to add the final details. Our trees are now bearing fruit, and several fruits lie under them.
If you look closely, you can see how each layer interacts with each other. A darker shade has more power, but when the colors overlap each other, they create an interesting and beautiful combination.
“Wet” technique
Step 1

Wet the paper with water
Step 2

Blot the paper with a clean sponge, removing excess water. Try to achieve an even distribution of moisture throughout the paper, you should get a satin effect.
If the paper is shiny, it means it is too wet, blot it again.
Step 3

We will draw the landscape again. Let's start, of course, from the sky. Using this technique, it’s easier to draw the background first, then moving on to the foreground objects.
Step 4

We continue to draw the sky until we start to like it. The strokes will blur, creating an interesting effect.
Step 5

Now let's move on to the grass in the foreground. Using green, we will make several broad strokes, leaving space for the stones.
As the paper dries, the strokes blur less and less.
Step 6

Let's add forms. To do this, we use different shades of green and draw trees on the horizon.
Step 7

Having added the trees, let's try to add texture to them. To do this, use a darker shade of green to create accents.
Step 8

Add stones using grey colour. We filled in the gaps in the foreground with this color, leaving some gaps.
Try to use either dark or cool shades. Using both dark and cool shades will create visual dissonance.
Step 9

Let's place accents to diversify the design. Using a crimson tint, we will depict several floral elements in the foreground. Let the crimson flow as it pleases. Then, using a dry brush, remove the color from the middle of the spots.
Step 10

Then drop clean water into the center of these spots to allow them to blend into the grass.
The hardest part about this technique is knowing when to stop. Overdoing it with blurs and colors will result in a messy drawing.
This technique gives a slightly strange but interesting result. A drawing made using this technique has a hypnotizing effect.
Dry brush painting
Step 1

We think the name of the technique speaks for itself. We will need to put paint on the brush, blot it from excess liquid with a paper towel or sponge, and then paint.
First, let's make a pencil sketch. After this, we roughly outline the sky by moving the brush over the surface of the paper.
Step 2

Let's draw green trees on the horizon, outlining what would later become our lake.
Then, mixing purple and blue, we will draw the first layer of the tree trunk.
Step 3

Let the drawing dry and add some elements: the reflection of a tree in the lake and the flow of water.
Mixing green and blue, shade the shore in the background of the image and let the drawing dry again.
Step 4

Mix an intense blue with ultramarine and paint a layer on the tree trunk to create shadows and bark texture.
Step 5

Then, using shades of orange, we will depict an autumn landscape by painting over the background trees.
Step 6

Having finished with the previous step, use a light orange tint to depict the reflection of the trees in the water.
Also, mixing gray with blue, we will place dark accents on the trees.
We will also add trees on the other side of the horizon. Let's denote the tree shapes in orange.
Step 7

Let's take care of the water. We use dark green and brown to achieve desired color. And with wave-like movements we will draw the water in the lake.
Step 8

When painting a lake, change the pressure on your brush to add texture.
Clue: if the brush is too wet, the paint will look flat. Dry the brush to intensify the colors.
Step 9

Let's add some grass under the tree, using the same color as for the grass in the background.
Step 10

Let's add some details to the foreground.
We will also darken the lake a little by adding a blue tint. We’ll also shade the sky with the same color.
Removing moisture
This technique will require several sponges. It is suitable for depicting clouds and soft light. It can also control the behavior of paints.

Sponges

Makeup sponges are best. They absorb well and give an interesting effect.
Try not to rub the sponge on the paper, and if you do, do it very carefully so as not to damage the paper.
Paper towels

With their help you can create sharper highlights. But paper towels absorb very quickly great amount paints. Therefore, they can completely absorb fresh paint.
Paper towels can come in handy if you make a mistake. Then you can quickly remove the paint.
Dry brush

You can use a dry brush to create a design using this technique. To do this, rinse thoroughly and squeeze out the brush. With its help you can create clear lines.
Other methods:
- You can spray water where you want to remove the paint and then soak it up with a sponge.
- Use different fabrics to add texture
- You can use your fingers or other body parts. Skin can also absorb moisture.

Discoloration of dried paint
Watercolor brushes

Use clean water and a cloth, wet the desired areas, gently rub the drawing and remove the moisture with a dry brush. This method allows you to control the areas you lighten.
Brushes for oil or acrylic paint

Stiff bristles allow you to quickly scrape paint off the desired area. But it is worth noting that this method can damage the paper, so control yourself.
Here, just like in the first method, you first need to wet the area and then brush it on.
Spray and towel

Take a spray bottle and spray the desired area, and then apply a paper towel to it. This method leaves large light spots and gives an interesting effect.
Sandpaper

It is very rarely used, as it can damage the paper. It's best used at the end to add texture. You don't need water for this method, just rub the design where you want it.
Blades and knives

Can be used to highlight small areas and create crisp lines. This method is also very risky as it can damage the paper.
Sponges

You can also use sponges. Wet the desired area and dry it with a sponge.
Watercolors are artistic paints based on vegetable glue, soluble in water. It lays down in a thin translucent layer, which is its feature. Watercolors were first created in China in the 2nd century AD. Watercolors are painted on special watercolor paper, which differs from the usual thickness, density and texture; soft brushes are usually used - squirrel or kolinsky. Before applying watercolor to paper, it is diluted with water; after drying, it can be stored for quite a long time.
WHAT IS THE ARTICLE ABOUT?
Composition of different colors
Do you know what watercolor paints are made of? For their production, aniline, mineral and plant components are used. However, the aniline substance is used least often, since it gives a stable, rich color, saturating the paper through and through, without being washed out by water, which eliminates the most important feature of watercolor paints - translucent application.
One of the most common components is mineral. Its advantage is durability and low cost. So, to make watercolors, crushed color pigments mixed with water are combined with a binder and the resulting mass is packaged in tubes, cuvettes or pressed into a cake shape.
Fish or cherry glue, gum arabica, candy sugar, gelatin and others are used as a binder for all components. The highest quality watercolors are made with the addition of gum arabica, sometimes with an admixture of candy sugar (from 20 to 40%), as well as wood glue or dextrin in various proportions.
Different types of minerals correspond to a specific shade of watercolor.
Lead white with a large amount of heavy spar admixture gives White color. The snow-white shade is obtained from the highest grade lead white - Kremzerweiss.
Yellow color is made from crown yellow - chromium-lead salt, and yellow carmine, ocher, cadmium sulfide, etc. are also used. These paints vary in shades from light yellow and lemon to rich orange and ocher. The peculiarity of yellow paints is the change in shade in sunlight. If the watercolor is made on the basis of crown, it should be taken into account that it cannot be combined with paints that contain sulfur, i.e. with blue shades.
Red shades are made from lead minium - a mineral paint that has a bright red color, the highest grade is Mignorange. The finished shade of watercolor depends on the degree of grinding of the particles: the finer, the brighter the color.
The color red is also obtained from carmine. However, its origin is not mineral, but animal, which gives this paint a specific property - insolubility in water.
Shades of blue are made from artificial ultramarine. Its shades range from sky blue to dark blue. The lighter color comes from the mineral components of the fine fracture.

Also Prussian blue blue is the basis of blue watercolor paints, its color is dark blue.
Indigo is a dark blue color with a copper-red tint, perhaps of mineral or plant origin.
Green shades are obtained by mixing blue and yellow paints or they are made from crown green, verdigris, cinnabar green, chrome green, ultramarine green, etc.
Manufacturing process
How are watercolors made? The process of making watercolors begins with selecting the desired shade of mineral paint. You can choose it from ready-made raw materials or by mixing several colors. If the shade is too saturated, it is weakened by adding white.
Most important point in production – careful grinding of mineral raw materials. Since mineral paints often do not dissolve in water, coloring occurs due to the attachment of paint particles to the paper surface.
- Primary mineral raw materials are produced in pieces or coarse powder.
- Next, the mineral paints are crushed in a paint grinder, runners, ball mills or a stone mortar if it is made by hand. The finer the particles obtained, the higher the grade of watercolor paint.
- Then the resulting mass is combined with a binder, for example, gum arabic. So for the red color, made from carmine, only a candy solution is suitable, and a dextrin solution is used for emerald green and chrome color.
- The amount of binder depends on the mineral raw material; white and black colors require it the least, and ocher shades require the most.
- After combining the mineral paint with an aqueous solution of a binder, a clay-like dough is obtained and rolled out to a thickness of 5-8 mm, after which it is left to dry for 12 - 20 hours.
- If the watercolor is subsequently packaged in a tube, then in addition to the binder, non-crystallizing liquid honey or glycerin is added.
- Depending on the release form, liquid watercolor is packaged in a jar, semi-liquid watercolor in a tube, solid watercolor in a cuvette or tile.
- When the watercolor has hardened enough, it is formed into the chosen shape. The finished mass is cut into appropriate pieces and glued to the tile with wood glue or fish glue.
Second cooking method
Glycerin is poured into the reactor with additional binding elements. Next, a coloring pigment is added to the bowl (special bowl), and the entire resulting mass is mixed for a certain time. Then, in a thin stream, the watercolor blank enters a paint grinding machine designed for a specific color and is ground. Next, the mass enters vats, from which it is poured through special hoses into a packaging machine, where the colors are packed into ready-made containers for sale, and then the watercolor is dried for two days.
An example of making blue paint
Prussian blue mineral paint is finely ground, combined with water and hydrochloric acid, and then brought to a boil. After which the paint settles, excess liquid merges. Gum arabic and glue, which is previously dissolved in water, are added to the resulting mass and heated at a measured temperature until a paste of thick consistency is obtained.