The structure of a lesson in visual arts. Outline of a drawing lesson (senior group) on the topic: educational area: artistic and aesthetic development lesson outline on art activities on the topic “self-portrait”
with priority implementation physical development Krasnoselsky district of St. Petersburg Game-entertainment with pencil in the second junior group Prepared and carried out teacher Groups No. 7 Torovets Elena Anatolyevna St. Petersburg 2011 GAME ONE “The pencil came with friends - Children play with us!” Program content:
Preliminary work: During walks, show lean techniques. creativity: drawing with a stick on glass. Materials:
PROGRESS OF THE GAME To the musical accompaniment, the teacher brings a cheerful "Pencil". Inflammation: - Who came to visit us, visited our garden? Let's say Together together: Cheerful Pencil! - Kids, why do we need a pencil, what can it do? (You need to draw with pencils). What color pencil came to visit us? (Red). What can you draw with a red pencil? (Tomato, balloon, flower…) What else do we need to draw? (Paper). Let's take the red pencils in our hands and come To the easel. Now take turns drawing everything that... I want to. Look, Pencil, what pictures our people have drawn Children. Pencil: thanks the children and expresses the desire not to part with them. GAME TWO Program content:
Preliminary work: Look at pictures depicting grass, flowers, the sun; pay attention to their color. Materials:
|
PROGRESS OF THE GAME
Karsh: -I greet the guys!
Let's draw again!
I brought my friends to make it more fun!
Inflammation: -What kind of sticks are these?
Not simple ones, but colorful ones!
All you have to do is pick it up and start drawing! (draws attention to the cups with pencils)
Let's guess together what friends Pencil brought with him (the teacher approaches clean slate paper and begins to draw and read riddles for the drawing)
This is a yellow circle of sun, a lot of sticks around! (draws the sun)
This little red flag is like a bright light! (draws a checkbox)
This blue flowers unprecedented beauty! (draws flowers)
This is green grass, tender grass - an ant! (draws grass)
This is a brown bear, a fat, funny little naughty boy! (draws a teddy bear)
And this is a black puppy, and his name is simple - Buddy! (draws a puppy)
Look what we got? Who helped us draw?
That's right, these are pencils!
Guys, now you can play with Pencil’s friends and draw. Sit down in your seats, there are sheets of paper prepared for you. Don’t forget how to hold a pencil correctly (the teacher shows the correct position of the pencil in your hand)
At the end of the lesson, the children examine their drawings and say goodbye to the Pencil.
GAME THREE
Program content:
- Reinforce the idea of the color blue;
- Continue to learn how to hold a pencil correctly;
- Learn to draw raindrops with strokes;
- Enter the application;
Preliminary work:
Materials:
- Easel
- large album sheet
- blue pencil
- half a landscape sheet with an applique of clouds for each child.
PROGRESS OF THE GAME
The teacher and the children remember how they watched the rain, read a poem about rain, for example:
“It’s raining, it’s pouring rain,
Get the little kids wet!”
Inflammation: - Guys, what is the poem about? That's right, about the rain.
And now we will play the game “Sunshine and Rain.” (When I say “The sun is shining more cheerfully, go out for a walk quickly!” - you walk around the group, and when I say “It’s raining, it’s raining harder, hide in the houses quickly!” - you hide in the houses.) During the game, the teacher imitates the sounds of falling drops of rain.
And now we will listen to the song “Rain”(lyrics by A. Barto, arrangement by G. Lobachev):
Rain, rain, drip and drip!
Wet paths.
We can't go for a walk:
We'll get our feet wet!
Cap! Cap! Cap! Cap! Cap! Cap! Cap!
After the song, the teacher shows a sheet with an applique in the form of a cloud and asks:
Guys, what is shown on the sheet? That's right - it's a cloud.
Look, it started to rain from the cloud (we show how rain is drawn) - drip, drip, drip.
Guys, you have sheets of clouds on your table, let’s draw some rain. We will take a blue pencil with you and draw raindrops from top to bottom (the memory reminds you how to hold a pencil).
While the children are drawing, the teacher reads a poem:
“The rain is pouring down drip and drip
Don't keep dripping like that for too long!
We are running through puddles,
We shout loudly and cheerfully!”
In the final part of the game, the guys look at the drawings, note who is having rain (heavy, or about to stop).
Preview:
GDOU d/s No. 39 of a general developmental type
Integrated
direct educational
artistic activities
creativity in middle group:
palm print and finger painting.
Prepared and carried out
teacher
group No. 7
Torovets
Elena Anatolyevna
St. Petersburg 2009
Theme: "Cockerel"
Program content:
- To cultivate a moral and aesthetic attitude through the depiction of animals in an unconventional drawing technique, a caring attitude towards the cockerel.
- Develop a sense of color, texture, teach accuracy.
- To form in children an idea of characteristic features images of a rooster, hen, chickens based on figurative and expressive means, poetic word, music and artistic creativity; continue to develop the ability to draw with your palm and fingers.
- Develop the ability to expressively depict a cockerel, chicks, hen in a poem, song, movement; consolidate knowledge about color (red, yellow), consolidate the ability to correctly use a brush and gouache.
Regions:
Artistic creativity, cognition (speech development, ecology), music.
Materials:
- Cockerel (be-ba-bo)
- hen and chicks mask
- yellow and red gouache
- Parallon jaws
- black markers
- bowls for gouache
- jars of water
- cloth napkins.
Preliminary work:
- Consideration book illustrations to the tales of the cockerel
- Learning nursery rhymes, poems, riddles, songs.
Progress of the game:
(Children are included in the group under Russian folk music, stand in a circle and follow each other like cockerels. They walk with their heads held high, their knees raised high, and their hands slapping their sides.)
Inflammation: Guys, look, while we were dancing, someone came to visit us. Who is this?
That's right, cockerel.
Cockerel: Here comes the cockerel
The comb is raised proudly
Red beard, important gait.
Inflammation: Reb. let's play with the cockerel.
A game:
Kukareku!, Kukareku! -The children wave their arms like wings.
I’m sitting on a bitch, looking in all directions!reb. squat on one knee and turn your head in different directions.
Proudly wears a comb -reb. They walk in place, raising their legs high.
Handsome cockerel.
Rises with the sun- slap their thighs
In the morning he calls - palms
Cockerel: You guys played so beautifully that I wanted to give you a yellow egg (with a small plastic chicken inside). What's inside? That's right - chicken.
Inflammation: -Guys, let's remember what kind of family the cockerel has (chickens and a hen).
Right. The cockerel gave us his chicks. Today we will draw friends for the cockerel. We will take a sponge, dip it in gouache and smear it on our palm, and make an imprint with our palm and thumb. This will be our rooster. Now dry your palms with a damp cloth. (children repeat the actions after the teacher) Dip your finger in paint, whatever you like, and draw a tail - it can be multi-colored, and with red paint we will draw a comb and beard. While the paint dries, we'll play.
Game "Bird Yard"
"How a cockerel breathes"- breathing exercise
"Like a Chicken Runs"- fast running exercise
"How do chickens peck"- children squat and tap their fingers on the floor
Inflammation: Guys, while we were resting, our cockerel’s tail dried up. Now we can use a felt-tip pen to finish drawing the eyes and beak (the children do the work), paws, sun, grass, grains.
Analysis: - Children, please bring me your drawings, we will look at them. Look what poultry yard we succeeded. The cockerels are wonderful, one better than the other.
Our guest liked all the drawings. Reb. It’s time for the cockerel to return to his home; the hen and chickens are waiting for him there.
It's time for us to part
Goodbye kids!
I'll take you home!
To the music, the children leave the group.
Preview:
GDOU d/s No. 39 of a general developmental type
with priority implementation of the physical development of pupils
Krasnoselsky district of St. Petersburg
Leisure time for artistic activities
creativity for
parents and children of the middle group
"Journey into a Fantasy World"
Prepared and carried out
teacher
group No. 7
Torovets
Elena Anatolyevna
St. Petersburg 2009
Topic: “Journey into the world of colors and fantasies”
Region:
Artistic creativity, cognition (speech development), music.
Program content:
- To increase the pedagogical competence of parents in artistic and creative development.
- Create a favorable microclimate for the development of fantasy and imagination in children and parents.
- Promote the establishment of partnerships between parents and children.
- Creating conditions for mastery non-traditional techniques drawing by parents in joint activities with kids.
Material and equipment:
- on the wall: sad cloud - happy cloud
- Drawing Heel
- White A3 paper in the shape of a cloud for each child
- Puddle - wet Whatman paper
- Drawing foam (mascara + baby shampoo + water)
- Multi-colored gouache in jars
- Pipettes for blotography
- Multi-colored gouache poured onto foam rubber for printing
- Potato prints with different shapes
- Watercolor for finger painting
- Water
- Rags
- Musical accompaniment: rain music, song “Clouds”
- Artistic word: poetry.
Introduction for parents
– We all know that drawing is one of the greatest pleasures for a child. Drawing reveals it inner world. After all, when drawing, a child reflects not only what he sees around, but also shows his own imagination. And as adults, we shouldn’t forget that positive emotions are the foundation of children’s mental health and emotional well-being. And since drawing is a source of a child’s good mood, you and I need to support and develop the child’s interest in visual creativity.
– Today I want to tell and show you how unusual the world in which he lives can become for a child.
– Working with children for many years, I came to the conclusion: a child needs the result that causes him joy, amazement, surprise.
– And I chose the direction of my work – the use of non-traditional techniques in drawing:
- fingers
- palms
- signets
- with chopsticks
- leaves
- colored soap foam
- pipettes (blotography)
- toothbrushes and combs (spray)
- wax chalk, candle
- cotton swabs and balls
- bristle brush
- on wet paper
- on wet cloth
- on plates, glass.
– After all, it is very important what results the child will achieve, how his imagination will develop, and how he will learn to work with color. The use of such techniques will satisfy his curiosity and help overcome such qualities as: “fear of seeming funny, inept, misunderstood.” My classes are improvisation and play and it is very important that they become a sustainable hobby for every child. IN kindergarten favorable conditions have been created for this.
– I would like to wish you to draw the same way at home. You will become like-minded people, partners, and friends for your children.
– Now...meet the children.
LEISURE COURSE
- Hello guys! Look how many guests we have today! Let's say hello to them. And our main guests are your parents, they really want to draw with you today, come up to them.
- Well, it seems that you are ready and it’s time for us to set off on our journey... But what can we travel on?
- And we will go on a cloud. To make it unusual, fabulous and very light, we will decorate it with soap bubbles. Want to?
(You need to touch the paper soap bubbles several times in different places without turning the cloud over. Work in pairs - child-parent).
– And while you are waiting for the journey to begin, look at your clouds... Maybe someone else is hiding in a cloud and wants to go with you?
- Look what a big cloud has flown towards us. Listen to why she is so sad.
A cloud flew across the sky
And I was looking for friends.
Didn't meet anyone
That's why I became sad.
– To make the cloud more fun, let’s take her to a magical land. Sit on the clouds and let's fly. Close your eyes.
(Music sounds).
- A white and blue steamer is floating above the trees.
A steamer will put us on board and take us to the land of colors.
(Music ends)
- Open your eyes. So we arrived...
- Oh, guys, it’s already raining here. Look at the puddle, how clean the water is. But a puddle looks like a mirror! If our cloud looks into the water, it will see its own Bad mood- will be even more upset.
- Let's cheer up the cloud with colored rain? (Demonstration of blotography technique - dripping from pipettes).
Music of the rain. Children and parents “draw.”
Joint activities of children and parents.
The rain stopped (the music ended). What a beautiful and cheerful puddle you have turned out to be and it looks very much like a cloud. What about our cloud? Look, she's smiling. Thank you for making her laugh.
- Now look at your clouds, on the other side they are white... But we are in magical land paints Let's see what we can do to decorate the clouds...
- Signets. They are made from potatoes and can draw, just like that! (Demonstration of drawing technique)
Collective drawing.
The clouds were decorated very beautifully, but there was some space left on the clouds. What else can you draw with? (Fingers)
Fill the free space with colored dots
- Cloud was amused. The clouds decorated. It's time to go back.
Music started playing. Children and parents sit on the clouds and fly away to kindergarten to the song “Clouds” - sung in chorus. The music fades out.
- Here we are back. Did you enjoy our trip? What did you like?
– I hope that you spent your evening today with benefit for yourself and your child.
And he will be just as interested in you at home as you were - here and now! I wish you success!
Summary of fine art activities in the middle group on the topic: “Little Dwarf”
Author: Svetlana Sergeevna Polukarova, teacher of fine arts activities of the MKDOU "Anninsky kindergarten" ORV "ROSTOK" urban settlement. Anna, Voronezh region.
Description of the material: I offer you a summary of fine arts activities for children of the middle group (4-5 years old) on the topic “Little Dwarf” This material will be useful for kindergarten teachers of drawing.
Summary of fine art activities in the middle group on the topic “Little Dwarf”.
Target: teach children to convey in a drawing the image of a little man - a forest gnome, making up an image from simple parts: a round head, a cone-shaped shirt, a triangular cap, straight arms.
Tasks: consolidate the ability to draw with paints and a brush; lead to a figurative assessment of finished work.
Demo material: pictures of gnomes, theater puppet– gnome, bell, wooden shoes, song by Ekaterina Semenova “Little Dwarf”.
Handout: album sheets, simple pencils, erasers, gouache, brushes, sippy cup.
Methodical techniques: conversation - dialogue, game, reading the fairy tale “Dwarf Helpers” (translation by Ekaterina Nevilova), looking at illustrations and talking about them, summing up.
Progress of the lesson.
Teacher. Guys, today we will meet little people!
-Who do you think they are? (gnomes). They are as small as you. There are even fewer. (showing pictures).
- Show me how small they are? (We all show fingers together). This is what gnomes are like!
-Let's see what the gnomes have? (beard). There is a beard, a long beard. (show). The gnomes have wooden shoes on their feet (I’m showing shoes made of wood), which knock loudly.
How do wooden heels click? (children stomp their feet).
- What do gnomes wear on their heads? (caps). But it’s not just a cap, but a funny one with a bell that rings ding-ding. (I show a real bell and how it rings).
Guys, do you know where gnomes live? (children's answers). Dwarves live in a forest cave. In the cave, the gnomes love to play crackers with their grandfather. Listen to a poem about gnomes.
Poem by I. Evdokimov
On the edge of the forest there is an old house, a cheerful gnome lives in it
Sometimes he laughs so hard, as if thunder had struck somewhere.
When he sees everything big, he will laugh: “What is it?
I haven’t seen anything like this because I’m short.”
During the day the gnome usually plays, at night he lights up the stars -
This is nothing for him! That's it, a gnome! What an eccentric!
The forest is one of his family, the animals are best friends,
I wish I could make friends with him! Maybe I'll become a gnome?
Guys, let's play! You will become gnomes, and I have a doll - grandfather gnome. When grandfather claps his hands, you will walk towards him, and if he sings “la-la-la” you will jump. (a game is being played).
Independent work.
Now let's sit down at the tables and draw our little forest people - gnomes. If desired, I call one child to the board for a demonstration, and together with him I draw a gnome: the child draws the head (circle) and cap (triangle), and we draw the cone-shaped shirt and arms (stripes) together. Afterwards, all the children draw gnomes on their pieces of paper. First, let's draw with a simple pencil, then decorate with gouache.
Children draw to the music of Ekaterina Semyonovna “Little Dwarf”.
Summarizing.
At the end of the work, we examine the drawings and invite the children to choose the most beautiful, elegant gnomes or the funniest, saddest. We look at and enjoy the resulting drawings.
Photos from the lesson


Municipal autonomous preschool educational institution
"Kindergarten No. 3"
Educational field: Artistic and aesthetic development
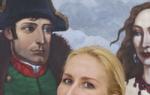
Summary of a lesson on art activities on the topic “SELF-PORTRAIT”
Performed:
Tropkina I.V.,
Job title:
Educator
Severouralsk 2016
Topic: “Self-portrait”
Age group:older age
Leading activity:gaming, cognitive-research, artistic-aesthetic, musical, motor.
Integration of educational areas:
artistic and aesthetic development, cognitive development, social and communicative development, speech development.
Promising goal:development in students of practical skills in depicting people in the genre portrait painting.
The goal is relevant : Show children techniques for drawing a self-portrait.
Software and methodological kit:
- Approximate basic general education program preschool education“From birth to school”, ed. N.E. Veraksy, T.S. Komarova, M.A. Vasilyeva. – M., 2014
- Visual activities in kindergarten: planning, lesson notes, guidelines. Senior group.Lykova I.A.-M.: Karapuz-didactics, 2009. - 208 p.
- Health-saving technologies of education in kindergarten.T.S. Yakovleva. - M., School press., 2006.
- 500 riddles for children. Maznin I. A.-ed. Sphere, 2008.
- 6.Lykova I.A.: Integration of the arts in kindergarten. - M.: KARAPUZ: Sfera, 2011.
Facilities:
- Visual range: presentation “Types of portraits”, illustrations, diagrams of a person’s face, portraits of mothers and fathers from previous classes.
- Literary series: poems, riddles.
- Game situation:physical exercise “Artists”, dynamic pause"One two three four five."
- Equipment for the lesson:multimedia installation, computer for accompanying presentation, projector, stereo system.
- Handout:on each easel there are brushes made of colored paper and palettes corresponding to them in color - for each child (red - strong level, blue - medium, green - low); on a separate table for selection - colored pencils, wax crayons, flat and round brushes - medium and small number; on every easel watercolor paints, palette, sponge, water, napkin or rag, paper (for a high level - a blank sheet, for a medium level - a face oval line is drawn, for a low level - a face oval line is drawn with points marked on it for the eyes, nose, mouth); mirrors
- Musical: fabulous music for drawing.
- Dictionary: portrait, single portrait, group portrait, self-portrait.
- Preliminary work:looking at photographs and portraits, drawing portraits of mom and dad, reading fiction, fairy tales, poems about family.
- Working with parents:Creating a favorable atmosphere in the family, nurturing a respectful attitude towards the older generation,designing a booklet, talking about the family, looking at family photo albums with the children.
Organization of educational space:
- Org. moment - exhibition corner
- Current. knowledge, studying material - game Zone, children sit on chairs in front of the projector
- Physical minute – play area; children are on the carpet in front of the chairs
- Practical work is a training area where there are tables with prepared necessary materials and an easel for each child.
- The result of the lesson is a play area, sitting on the carpet, children stand up with their work and talk about it
- Methodical techniques: game situation, solution problematic situation, conversation-dialogue, productive activity of children, analysis, summing up, encouragement.
- Integration of educational areas: artistic and aesthetic creativity, cognitive development, speech development, physical development.
- Target: To consolidate children’s knowledge about portraiture, its features, that the artist in a portrait conveys not only external resemblance, but also the inner world of a person, his character, mood;
Planned results
- Interested in new, unknown things in the world around him;
- Shows a steady interest in various types of children's activities: design, visual arts, game.
- Reacts emotionally to works visual arts, musical and works of art, natural world.
- Organizes workplace; shows accuracy and composure in the execution process, careful attitude to materials and tools.
- Works according to the rule and model, listens to an adult and follows his instructions. To develop the visual skills necessary to implement various types productive children's activities
- Methodological justification for the lesson:Form/occupation. Introductory phase including exploration phase educational material, generalization and consolidation of children’s knowledge on the topic. Methods and techniques of teaching. Creating a problematic situation, prompting dialogue from the problematic situation.
- Methods.
- Practical:
- productive activity;
- game exercises.
- Verbal:
- explanation;
- conversation;
- questions for children;
- instructions and stages of implementation;
- creating interest;
- artistic word (poems);
- Visual:
- scheme;
- show
- Principles of learning: activities; the principle of psychological comfort; principle of cooperation; principle of conformity with nature (taking into account age and psychological characteristics). Forms of organizing the activities of pupils: - frontal form; individual (at tables, at interactive whiteboard); - group (at tables).
Tasks educational program | Tasks taking into account individual characteristics Pupils of the group |
Educational:
Educational:
Educational:
| Educational:
"self-portrait";
Educational:
Educational:
and children to each other;
|
Abstract to the summary.
Portrait is one of the genres of painting dedicated to depicting a certain specific person. IN short dictionary terms of fine art like necessary requirement The portrait is aimed at conveying similarities in the image of a specific, specific person. The art of portraiture accumulates interest in human individuality. In the genre of portraiture, there is an opportunity to talk about those people whose appearance and lifestyle prompted the artist to take up his brush and seemed extraordinary to him. Lively and touching phenomena of life can last for moments and the artist has the opportunity to talk about them.
In a children's portrait created by the children themselves, most likely there will be no facial resemblance, but, undoubtedly, the child will try to convey his attitude towards the people he draws. It is imperative to give children the opportunity to express their feelings for loved ones through the world of art, leading them to a value perception of family relationships.
Stages GCD | activities | Activity teacher | Children's activities (actions, the implementation of which will lead to the achievement of the planned result). | Methodological justification (planned result) |
Psychological attitude 1 min. Introductory organizational 1 min. 2. Introduction to the situation 10 min. Fizminutka "Artists" 1 min. 3. Difficulty in the situation Formulation of the problem 1 min. 4.Search 1 min. Dynamic pause 1 min. Practical work 10 min. Bottom line. Recording the results. 1 min. Reflection. 2 minutes. | Welcome guests! Making eye contact. Educator: I say hello everywhere. At home and on the street! EvenHello, I say to the chicken. Hello morning! Hello day! We are not too lazy to say hello. Mystery: This eye is a special eye. Educator: Guys, every home contains photographs of grandparents, mothers, fathers, and friends. We look at them and remember where we were, how we lived, how we dressed. Photos can tell a lot. Before, when there were no cameras, various events artists reflected in people's lives. More often they painted portraits of people. We have already talked about what a portrait is. Remind me, please, what is a portrait? (Portrait – this is a picture of one person or group of people). What types of portraits do you know? ( Single, group, men's, women's, children's, in full height, waist-deep, head and shoulders, self-portrait). Presentation "Types of portraits" prevents fatigue. We'll do some magic with our eyes. Educator: Guys, your parents have received a proposal to organize an exhibition of portraits on the theme “Dad, Mom, I – a friendly family.” We already have portraits of moms and dads. What do we need to complete the exhibition design?(Our portraits). Agree with you. But where can we get your portraits? (Draw) Who will draw you? (… ) What will help you with this? (...) Guys, please stand in the place that you like, we will have a physical education session with you The group raises its hands - this is time, The head turned - that's two, Hands down, look forward - that's three, Arms to the sides wider, turned to four, Pressing them forcefully to your shoulders is five. All the guys sit down quietly - that's six! The teacher invites the children to draw themselves while looking in the mirror. PUZZLES
They are the most important on the face, so they live in the middle of the face, but what do they look like? (on leaves, boats). The forehead is above the eyes, place your palm on the sheet, there should be eyes under the palm. In the middle of the eye there is a colored circle - the iris; color it with paint or a pencil of the color that is in your eyes. In a colored ball there is a black dot - the pupil. Don't forget to draw eyelashes. Immediately above the eyes are the eyebrows. What are they like? (arcs)
At the end of the lesson, look at the portraits. Educator: Guys, what were you drawing now? (Self-portraits). For what? What helped you draw yourself? What wonderful self-portraits you turned out! Admire it. Whose self-portrait do you think is most similar to the author? What helped you? (Eye color, facial expressions, clothing) What was particularly successful? What didn't work? What were you surprised by during the lesson? (In the evening, the children decorate an exhibition of portraits on the theme “Dad, Mom, I - a friendly family”). | Creates an atmosphere of psychological safety: empathic acceptance, emotional support for children. Involves listening. Emotionally involves action and listening. Involves participation in joint activities. Uses a method to revive children's emotions and activate perception using ICT Emotionally brings into action, prevents fatigue. Asks questions that stimulate the thinking process. Involves participation in joint activities. Asks questions that stimulate the thinking process. Provides an opportunity for children to discuss and find a constructive solution. Provides enough time for study and observation. Applies health-saving technologies. Exercise relieves muscle tension caused by immobility, switches attention from one activity to another Involves participation in joint activities. As work progresses, he reminds the children not to forget. small parts: eyebrows, eyelashes, bangs, etc., because all the little things are important in the drawing. They reflect the unique character of a person. Repeat that children draw a self-portrait, i.e. themselves. During the children’s work, he controls the process and provides all possible assistance. Involves children in summing up results and in reflection (self-analysis). Provides openness to oriented independent activity. Draws attention to the features of each self-portrait. Provides a place where children can display their work. Expresses gratitude. | Greeting guests. Participate in group activities. Repeat words and movements after the teacher.
Express their own thoughts and feelings. Improve communication skills. They strive to draw their own conclusions and conclusions They look and discuss reproductions They play actively. They participate in dialogue, express their opinions based on existing ideas, and recall what they have learned earlier. They work together. Improve communication skills Use materials that can be used for educational and research activities. Perform movements in accordance with the text. Calm down nervous system and restore functionality They sit down at their workplaces and prepare for productive activities. Use Techniques and skills for drawing a “self-portrait”. Convey resemblance to real objects, enriching the image with expressive details, color, location Share impressions; express their own feelings about the work done; planning an independent (joint) activity; express an emotional response. Children's suggestions. | Psychological readiness of children for activities Formal readiness for upcoming activities, attracting involuntary attention. Motivational readiness of children for joint activities. Usage this method contributed to the development of components perception, emotional responsiveness
Conscious, acquired skills, abilities, etc. Relieving tension, emotional and physical release. Manifestation of creative activity in the process of visual activity. Ability to select necessary materials for work. Draw a logical conclusion, follow the rules Skill:evaluate the results of your activities; Express feelings; draw conclusions; to plan independent (joint) activity. Mastery:a certain amount of practical skills and abilities when teaching productive activities; |
Preview:
To use presentation previews, create an account for yourself ( account) Google and log in: https://accounts.google.com
Slide captions:
PORTRAIT
Male, female and child's portrait M.A. Lvovoy. D.G.Levitsky “Portrait of Mika Morozov” Valentin Serov D.G.Levitsky Portrait of P.V. Bakunin Bolshoi.
Group D.G.Levitsky Portrait of pupils of the Imp. playback total good girls E.N. Khrushcheva and E.N. Khovanskaya.
Single D.G.Levitsky Portrait of a pupil of the Imperial. playback total good girls N.S. Borschova.
Full-length D.G. Levitsky Portrait of a pupil of the Imp. playback total good girls A.P. Levshina. Portrait of a pupil of Imp. playback total good girls G.I. Alymova.
Waist-deep Dmitry Grigorievich Levitsky Portrait of I.L. Golenishcheva-Kutuzova
Shoulder-deep Dmitry Grigorievich Levitsky Portrait of M.A. Dyakova. 1778 Portrait of N.A. Lvov. 17
Head of Bronnikov F.A. Old man's head
CONSULTATION
for parents
“Organizing arts and crafts classes with a child at home”
Great potential for development children's creativity is contained in the visual activities of preschool children. For the successful holistic development of the child, your role, dear parents, is enormous. By creating conditions for drawing, sculpting or appliqué classes, parents form a stable interest in visual arts and develop their abilities.
A child’s visual activities in a family environment include drawing with pencils, paints (gouache, watercolor), felt-tip pens, modeling from plasticine, clay, and appliqué from shapes pre-cut by adults. Every child can learn to draw and sculpt if adults pay attention to these activities and patiently help them master skills and abilities.
The baby only benefits from drawing. The connection between drawing and a child’s thinking is especially important. At the same time, visual, motor, and muscular-tactile analyzers are included in the work. In addition, drawing develops memory, attention, fine motor skills, teaches the child to think and analyze, measure and compare, compose and imagine. For the mental development of children, the gradual expansion of the stock of knowledge is of great importance. It affects the formation of vocabulary and coherent speech in a child.
We adults sometimes don’t share the happiness of our children, and we even feel outraged to the core when we look at the kid’s art on the walls in the apartment. But drawing is of great importance in shaping a child’s personality. Therefore, before scolding your child, try to direct his creativity in the right direction.
Parents need to create conditions at home for visual activities so that the child can sculpt and draw.
Let's organize a place.
The place where the child draws should be well lit. The light should come from the left side. Make sure that the child sits correctly at the table: does not hunch over, does not bend too low. Check whether the chair and table are appropriate for the child's height. On the table in front of the child there is a sheet of paper, on the right are paints, brushes, and in front is a jar of water. After washing the brush, the child blots the bristles with a linen cloth.
The child should have at home not only various art materials (pencils, paper, plasticine, paints), but also a place to store them. It’s good for this to have a children’s secretary or an open shelf where paints, brushes, wax crayons, pencils, paper, albums, coloring books, etc. will be stored. Gradually teach your child to use them independently. Let him prepare his own workplace and clean it after work.
It is more advisable to give a small child not pencils for drawing (they are hard and, with little pressure from a child’s weak hand, leave barely visible strokes and lines), but felt-tip pens, which leave a clearly visible, bright mark even when lightly touching the paper. It is very important. Drawing with felt-tip pens does not strain your hand, as happens when drawing with pencils. When the baby's hand gets stronger, you can use pencils.
Check how your child uses pencils and doesn’t throw them all over the table. It is necessary that while drawing, an open box of pencils (from 12 to 24) should be lying in front of him. This way he sees colors better.
From the first lessons, it is necessary to teach the child to correctly take a felt-tip pen, brush, pencil: with three fingers, thumb and middle, holding it on top with the index finger, hold it in the fingers and use it correctly. Naturally, at first the child does not succeed: his hand does not obey, the pencil often falls out of his hand. And here adults should come to the rescue. It is necessary to ensure that the child does not squeeze the pencil too tightly with his fingers, as this leads to overexertion of the hand, stiffness of movements; the child’s weak fingers may not be able to hold the pencil, and it will fall out of his hands. Therefore, while teaching your child, you need to watch how the child holds a pencil, brush, felt-tip pen and uses them. This skill is developed and consolidated very slowly.
Why does it happen that a child cannot hold a brush or pencil in his hand, often drops them and very quickly grabs them again with the whole pen? The fact is that he is used to grasping all objects not with his fingers, but with his fist. The correct finger grip is uncomfortable for him. You need to patiently move the pencil, teaching the child to hold it with three fingers. Gradually, the child’s hand will become stronger and the correct grip will be established. If you don’t pay attention to this, the child will continue to hold the pencil or brush in his fist, and he will not develop the correct skill for a long time.
There is an opinion that the smaller the child, the less visual materials he can master. However, the famous artist V.A. Favorsky believed that when teaching children it is necessary to use as many different artistic materials as possible.
At preschool age, children paint with two types of paints: gouache and watercolor. Gouache is the main material for drawing. Its advantage is that it fits well on any background and gives a bright, juicy spot. By mixing several colors you can get different shades.
You can paint with watercolors only on white paper, diluting the paints with water. The more water, the more transparent the paint color. In the family, the child often paints with watercolors than with gouache, so pay attention to the technique of working with these paints.
To paint with paints, you need to have 6 - 12 brushes of different sizes. Thin for drawing small details, thick for painting large details, toning paper.
In order for a child to achieve good results in visual arts, it is necessary to teach him how to use paints correctly: before painting, “buy” a brush in water, drop one drop on required colors watercolors, when painting, carefully pick up paint on the brush, confidently move the bristles of the brush over the paper, iron rather than rub the paper with the bristles, rinse the brush by applying it to a cloth; When using several colors, do not mix them with each other.
You can paint with a round soft brush with the entire bristle and its end (thin lines, small details). It is recommended to give children an adhesive, hard bristle brush (you can use the poking method to paint foliage, falling snow, etc.)
A child should be introduced to other materials at an older age, but if an adult wishes, he can master drawing with wax crayons, chalk, sanguine, pastel, and charcoal.
Coloring albums produced by the publishing house "Malysh" can serve as a fascinating material for developing children's visual skills in a family environment. They contain not only pictures, but also tips on how to teach children to draw.
What and how to draw for children.
Almost all children draw. Some are more, others are less. But only one in several thousand becomes a professional artist. “In that case, maybe it’s not worth wasting time, paper, paints, pencils?” - what will the adults think? No, it's worth it!
Very often, adults are afraid to take up a brush or pencil, declaring that they do not know how to draw. Don't rush to get upset. There are many techniques with which you can create original works, even without any artistic skills. Both you and your child will not only get pleasure from such activities. In these games he will get acquainted with color, the properties of paints, he will develop artistic taste and spatial imagination, imagination and hard work.
I'll give you a few games.
“Make a hedgehog out of sticks”
Material:
counting sticks, or colored paper strips, or markers.
Children's actions:
lay out the image with sticks or draw the shelves with a felt-tip pen, or paste on an image from strips.
"Who's playing hide and seek with us"
Material:
cards with background different color(green, yellow, striped, brown, white), animal figures (frog, jaguar, tiger, polar bear, white hare and brown hare, etc.) to check the correctness of the completed task, help in depicting animals.
Rules of the game:
take two cards of different colors and name animals with similar colors; Having received the figure, circle it on the desired background. The winner is the one who gets the most figures, and also draws suitable animals that the teacher did not have.
"Portraits"
Materials:
a sheet of paper with a drawn oval of a face; cardboard templates of eyebrows, eyes, nose, lips, ears, hairstyles.
Children's actions:
They lay out the head on a piece of paper, trace it, and color the resulting portrait.
You can purchase educational games “Color and Shape”, “Geometric Mosaic”, “Whose Shadow?”, “Funny Pencils”, etc.
You need to start teaching children to draw with objects that resemble geometric shapes in shape - a circle (ball, ball, sun), square (mat, cubes, book), triangle (slide, shovel), then combine these shapes into objects - a house, a mushroom, chicken, Christmas tree. Then, in a drawing, combine several objects with a common plot, gradually leading the children to plot drawing.
It is better to give children separate sheets of paper for drawing. It is desirable that the paper is not glossy, but porous, slightly rough. For drawing, sometimes you need paper of different colors and shades to convey the light of evening lights, bright lanterns on the branches of a Christmas tree, snowfall, etc.
It is very important that adults are attentive to the child’s desires to draw. Often, due to the fact that a child cannot draw anything, but only scratches a pencil on paper, adults treat his actions and drawings with a condescending and mocking attitude: “What did you draw, a little scrawl?” The child begins to understand both the mocking attitude towards his activities and the negative assessment of his results: “to draw a little scribble” means that nothing good can be drawn. And he has an opinion about drawing as an empty activity.
Therefore, it is necessary in every possible way to support children’s interest in using a pencil and create good conditions for classes, providing them with everything they need.
Never ask your child to draw something specific for you, you can only offer several options to choose from, but do not insist that the child must draw something from what you suggest; Let him better draw what he himself has in mind.
Often parents complete a drawing or improve something in the child’s work - they do this so that they can later demonstrate the child’s work to relatives and friends as his achievements. Don’t do it under any pretext - this also offends him, emphasizes his inferiority, his inability to draw well himself.
Encourage non-standard solutions for images or working methods; let the baby understand that the main thing is his imagination.
Review and discuss his previous works so that he does not forget that he already knows how to draw, that he has already done it very well once; Try to hang your child’s work on the wall.
Look at the work of other children so that he wants to draw the same.
View reproductions of paintings different artists, go to art galleries.
When is the best time to draw? We recommend drawing during the daytime, since drawing in evening light is undesirable. Duration no more than 20-30 minutes.
Remember, each child is a separate world with its own rules of behavior, its own feelings. And the richer and more varied the child’s life experiences, the brighter and more extraordinary his imagination, the more likely it is that the intuitive craving for art will become more meaningful over time.
Artistic activity from the very beginning must be closely connected with life. First of all, the child needs to clearly imagine what he will depict, and for this he must have a variety of impressions about the world. Ideas about objects and phenomena are formed on the basis of their perception. A child can get aesthetic impressions by looking at an illustrated book with a parent, observing the world around him, works of art, but you always need to draw the child’s attention to what is beautiful, tell him why this object is beautiful, highlight its special properties, color scheme etc. When a child learns to see and understand beauty, then he will receive vivid impressions of what he sees and the desire to express them through drawing will become stronger.
Of particular importance is the attitude of us, adults, to the products of children's creativity. Be sure to praise the little artist, arrange an exhibition of his works at home (attach files and insert works or make frames). Only a few years will pass and your baby, maybe already a schoolboy, will remember with you how happy he was while creating this “masterpiece.” Treat children's creativity with care and instill the same attitude in your children, children's work should be collected and preserved.
Every child can learn to draw if adults pay attention to these activities and patiently help him master the skills and abilities.
Let every child experience the joy of creativity in childhood.
V.A. Sukhomlinsky wrote: “The origins creativity and the talents of children at their fingertips, figuratively speaking, there are the thinnest streams that feed the source of creative thought. The greater the confidence of representation in the movements of a child’s hand, the more subtle the interaction with the tool, the more complex the movement necessary for this interaction, the deeper the interaction of the hand with nature, with social work into the spiritual life of a child. In other words: the more skill in a child’s hand, the smarter the child.”

Lesson notes on visual arts. Senior group. Topic: “Fairytale fish”
Educational objectives:- Clarifying children’s ideas about fish.
- Strengthen the ability to work with waste material.
- Strengthen the ability to format your work with additional material.
- Strengthen the ability to use material economically and rationally.
Developmental tasks:
- Development fine motor skills hands
- Development of fantasy and imagination.
- Develop perseverance and creativity.
Educational tasks:
- Formation of accuracy and careful attitude to materials.
- Develop the ability to notice shortcomings in your work and correct them.
Preliminary work:
Examination of paintings depicting fish (goldfish). Conversation about fish.
Modeling " gold fish" using waste material. View slides about fish. Reading a fairy tale by A.S. Pushkin “The Tale of the Fisherman and the Fish” Listening to the sound of the sea surf.
Demo material:
Slides, audio recordings of the sound of the sea surf, pictures of a goldfish.
Equipment:
Blue cardboard with a fish stencil image, sequins, scraps of fabric, a PVA glue brush, glue, paper napkins, scissors, oilcloth.
Progress of the lesson:
The sound of the sea surf sounds.
Educator - Guys, listen. What is this noise?
Children's answers. It's the sound of the sea.
Educator - Correct. And now, we will dream up a little. Imagine that we are on the seashore. There is a blue sky above our heads, warm sand under our feet, and the sea ahead. How beautiful! Let's remember the fairy tale by A.S. Pushkin's "The Tale of the Fisherman and the Fish".
Educator - Guys, what is this fairy tale about?
Children's answers. About an old man, an old woman, a goldfish.
Educator - Yes, this fairy tale is about a goldfish that fulfills all wishes.
Educator - A variety of fish live in the sea. There are fish that are edible for humans. Name what fish you know.
Children's answers. Pollock, pink salmon, perch, etc.
Educator - There are dangerous fish. They can prick with a poisonous thorn, like the sea cat and the sea dragon; and even give you an electric shock like a stingray.
Educator - Yes, there are a lot of fish in the oceans and seas.
Educator - And now we will look at slides with images of fish.
Educator - Guys, what kind of fish did you see on the slides?
Children's answers. Shark, dolphin, whale, etc.
Educator - You guys see, what an amazing and very beautiful sea world.
Educator - Guys, let's remember what body parts fish have and why they serve them.
All fish have a tail. He serves as their rudder. Fish also have fins. Why do you think fish have fins? The word itself will tell you. Fish need fins to swim. Of course, fish have eyes. What are eyes for?
Children's answers. The body of fish is covered with plates - scales.
Educator - Now we will rest a little.
Fizminutka:
"Steamboat"
The steamer pushed off from the green pier (stand up)
He took a step back first, (step back)
And then he stepped forward (step forward)
And swam, swam along the river, (hand movements)
Typing full speed. (Walking in place)
Educator - And now, you and I will perform the “Fairytale Fish” application. You have ready-made fish stencils on your tables. You need to use sequins to show the scales of the fish; we will make the tail from tracing paper. Then we will show algae and stones in the aquarium, for this you have strips green paper and scraps of fabric. Everything is clear, then let's get started. During work, I monitor the children’s activities and help if necessary. After completing the application, we lay out the work on the tables and examine them.
Lesson summary:
General questions:
Educator - Guys, what new have you learned about fish?
Children's answers. There are different types of fish. Dangerous for humans. Edible fish.
Educator - Guys, did you like working with unusual material?
Children's answers. Yeah interesting.
Educator - Guys, do you like the resulting fish of your comrades?
Children's answers. I liked it.
Educator - Today you did a very good job, and I prepared small gifts for you.
The teacher takes stickers of different fish from the bag and distributes them to the children.